How to Install WordPress on An Apache Server
Installing WordPress
WordPress is a great tool that enables you to write webpages without having to worry about crazy HTML stuff. Info Toast uses WordPress. In this tutorial, I will show you how to install WordPress on your website. If you haven’t figured out how to set up a website yet, go to the Tutorial in before this in this small series on How to Make Your Website For Free (Except Domain Names).
What You Will Need
There are a few things you will need to do this tutorial:
- A Server Running Linux
- An Apache HTTP Server
- SSH Configured on that Server
- An SQL Server
- A valid PHP Installation
- Access to the Internet
Instructions
Installing WordPress is incredibly simple. First, you will want to download the latest release of WordPress from https://wordpress.org. Now, put in the zip file with WordPress in it in your server’s root directory. Then, perform the following commands to unzip WordPress:
sudo unzip wordpress-[VERSION].zip

mv wordpress-[VERSION] site
Those commands will unzip WordPress and then replace the oddly named directory with the simple name “site.” I will discuss later in this tutorial about how to redirect people who are accessing the root of your server to the WordPress site. However, you will first need to complete the installation.
Setting Up the SQL Database
Next, you will want to go into your SQL server and execute the following queries:
CREATE DATABASE wordpress;

CREATE USER IF NOT EXISTS 'wordpress'@'[HTTP SERVER IP]' IDENTIFIED BY '[PASSWORD FOR WORDPRESS]';

GRANT ALL PRIVILEGES ON wordpress.* TO 'wordpress'@'[HTTP SERVER IP]';

FLUSH PRIVILEGES;
That will create a database called “wordpress” and then create a user called “wordpress” and then grant full permissions to the user “wordpress” for that specific database and then apply the new privileges.
Giving WordPress Access to Itself
Before you complete the installation process, you will want to ensure that WordPress has access to the directory WordPress is actually in. To do that, you will want to go to the terminal to the root directory of your website and execute the following commands.
chown -R www-data:www-data .

chmod -R 775 .
That will ensure that the Apache user on your system owns the server root directory and all the files in it, and has full access to its contents. Otherwise, you will get an HTTP code 403. Now, it is time to install WordPress.
Installing WordPress
Now, it is time to install WordPress. You will want to go to the following URL in your browser:
https://yoursite.com/site/
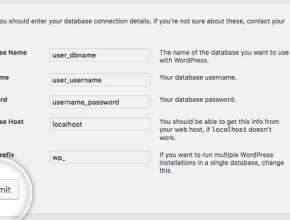
This will guide you through an easy installation guide. Just follow through the steps. Make sure you authenticate WordPress in the SQL server as the account that you created just a minute ago, and you’ll be okay. WordPress will write the configuration for you. Now, it’s time to make the server redirect you to /site when you access the index.

Changing the Index to WordPress
Sadly, the easiest way to do this still requires a little bit of coding. However, it shouldn’t be that difficult to do. Enter the following commands into the terminal when you’re in your server’s root directory.
sudo touch index.php

sudo nano index.php
Now, you need to enter the code for the index.php file. Enter the following into the text editor on the screen:
header("Location: yoursite.com/site/");

die();

?>
Now, you need to save and exit the file. Press CONTROL+O to save. Then press enter. Now, press CONTROL+X to exit. Now enter the following commands to ensure that the Apache server can execute the redirect script:
chown -R www-data:www-data .

chmod -R 775 .
Now, you’re done. Ensure that there isn’t any other index file there to complicate the server. Once you know that, you’re good to go. Go ahead and go to your browser and navigate to yoursite.com. If you went to your WordPress site, you’re good to go. Now go ahead and unleash your creativity without all of the need for doing things from scratch.


