How to Debloat Windows 10 (Tutorial)
For many people switching from Windows 7, Windows 10 has shocking bloatware. This bloatware can often slow down their machine and sometimes even spy on them. This tutorial shows how to use a tool to debloat Windows 10. It’s a simple PowerShell script, and it’s important to do it with every new Windows 10 installation.
Step 1: Download the Tool
First, you’ll want to download the tool for debloating Windows 10. Go to this link: https://github.com/Sycnex/Windows10Debloater. Once you’re there, you’ll want to download the tool. Go to the top left and click on Code. Then, click Download ZIP. It downloads a zip file containing the PowerShell script and everything you need to run it.
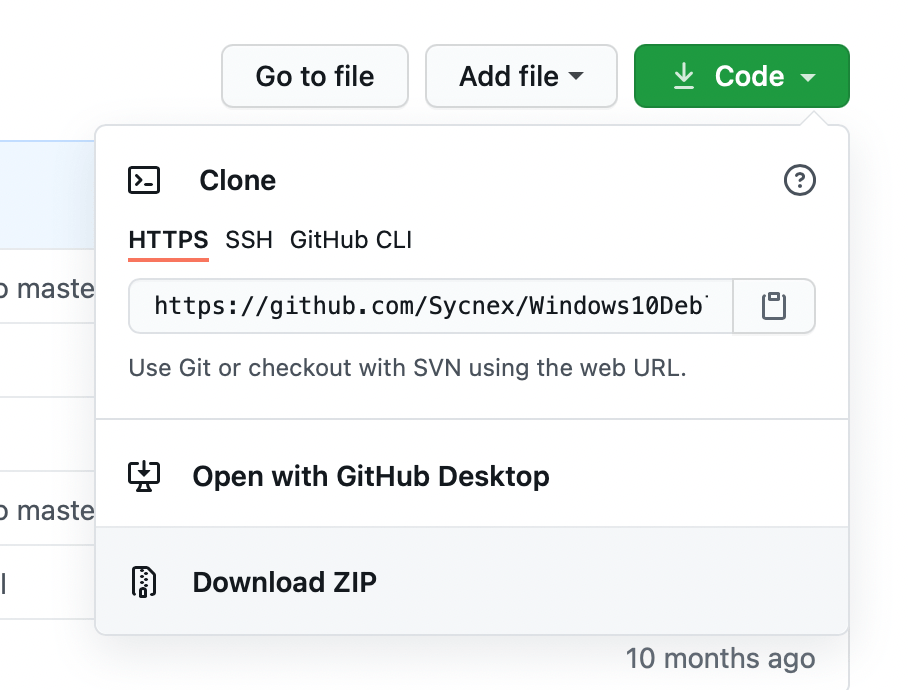
Once downloaded, open the zip file in File Explorer and extract it to a folder named Windows10Debloater-master (should be the default name).
Step 2: Debloat Windows 10
Next, go to Start and search PowerShell. Right-click on PowerShell and click Run as Administrator. Answer “yes” when prompted.

Now, here’s the tricky part. It will require you to run a few commands. Type the following into PowerShell:
cd C:\Users\[ENTER YOUR USERNAME HERE]\Downloads\Windows10Debloater-master\
Set-ExecutionPolicy -ExecutionPolicy Bypass -Scope LocalMachine
.\Windows10Debloater.ps1
Now that it’s running, it should be smooth sailing from here on out. It will ask you whether you want to remove something, and the answers are up to you and which bloatware you’d like removed. I typically remove everything, but it usually doesn’t break anything. It’s up to you.
Conclusion
If Linux isn’t for you, this is one of the ways you can remove the bloatware and spyware from your PC. This won’t fully remove everything from Windows, and it certainly doesn’t prevent Microsoft entirely. Still, it’s an extra line of defense for your online security and the performance of your machine.
