Minecraft Railroad Switch – How To Build
In Minecraft, railroad switches are an important part of railroad functionality, enabling Minecarts to operate in more than one direction and navigate anywhere in the world.
As of Minecraft 1.21, there is an experimental feature available to improve railroads, with the most significant feature being the minecartMaxSpeed gamerule, enabling Minecarts to move quicker. Because of those changes, many players are beginning to no longer neglect Minecarts and Railroads but don’t know where to start with their design. I will make a series of tutorials for various simple contraptions, including switches, freight, separating freight from passenger Minecarts, and even freight railyards. This guide will show how to create a proper Minecraft railroad switch for an optimal setup.
Finding the Location of Rail Switch
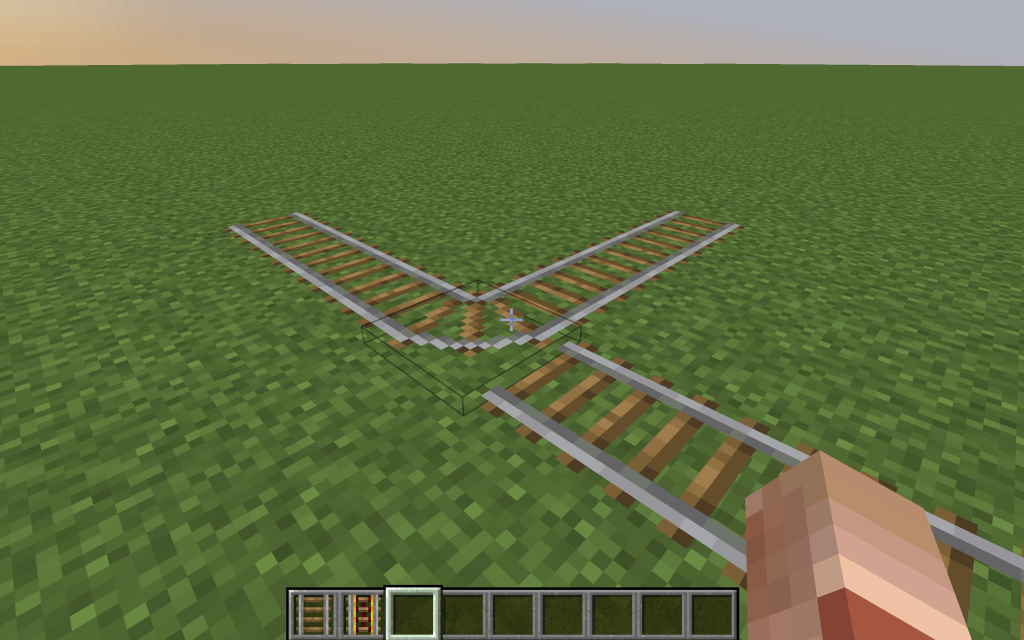
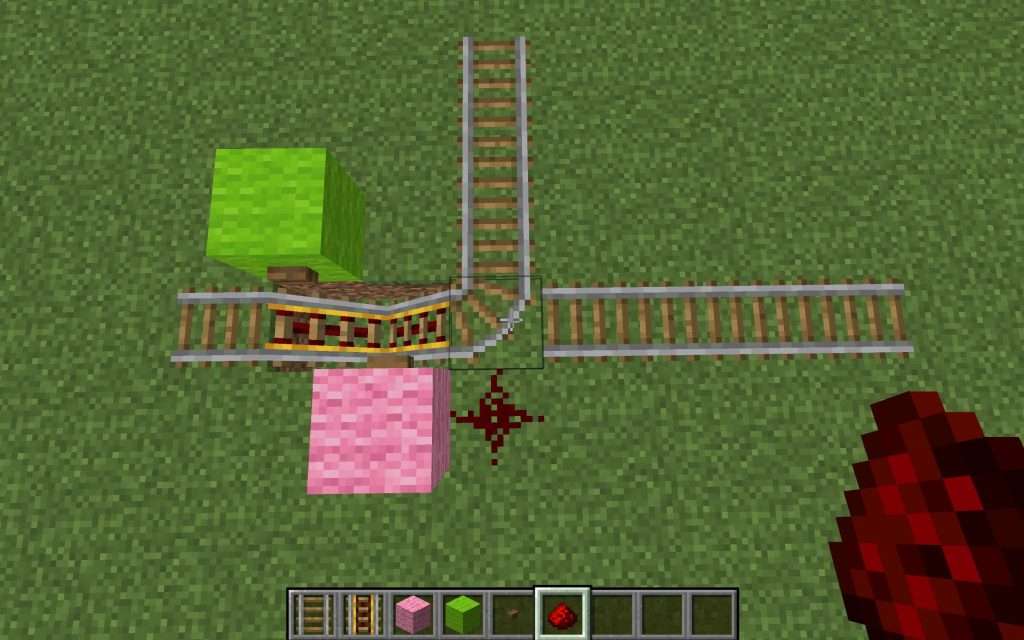
First, place rails in all three directions, like the image below.
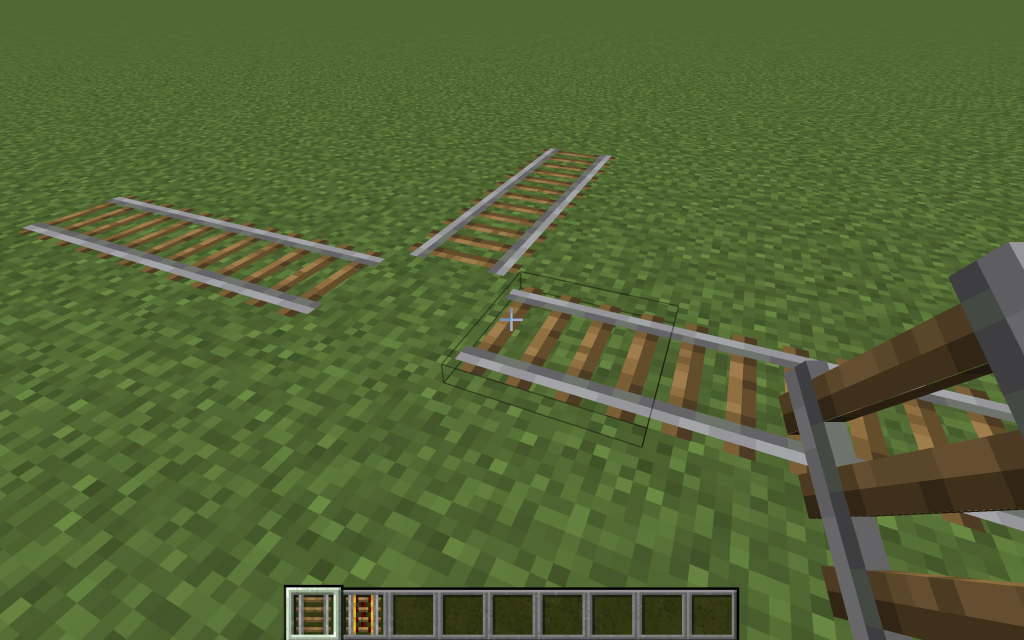
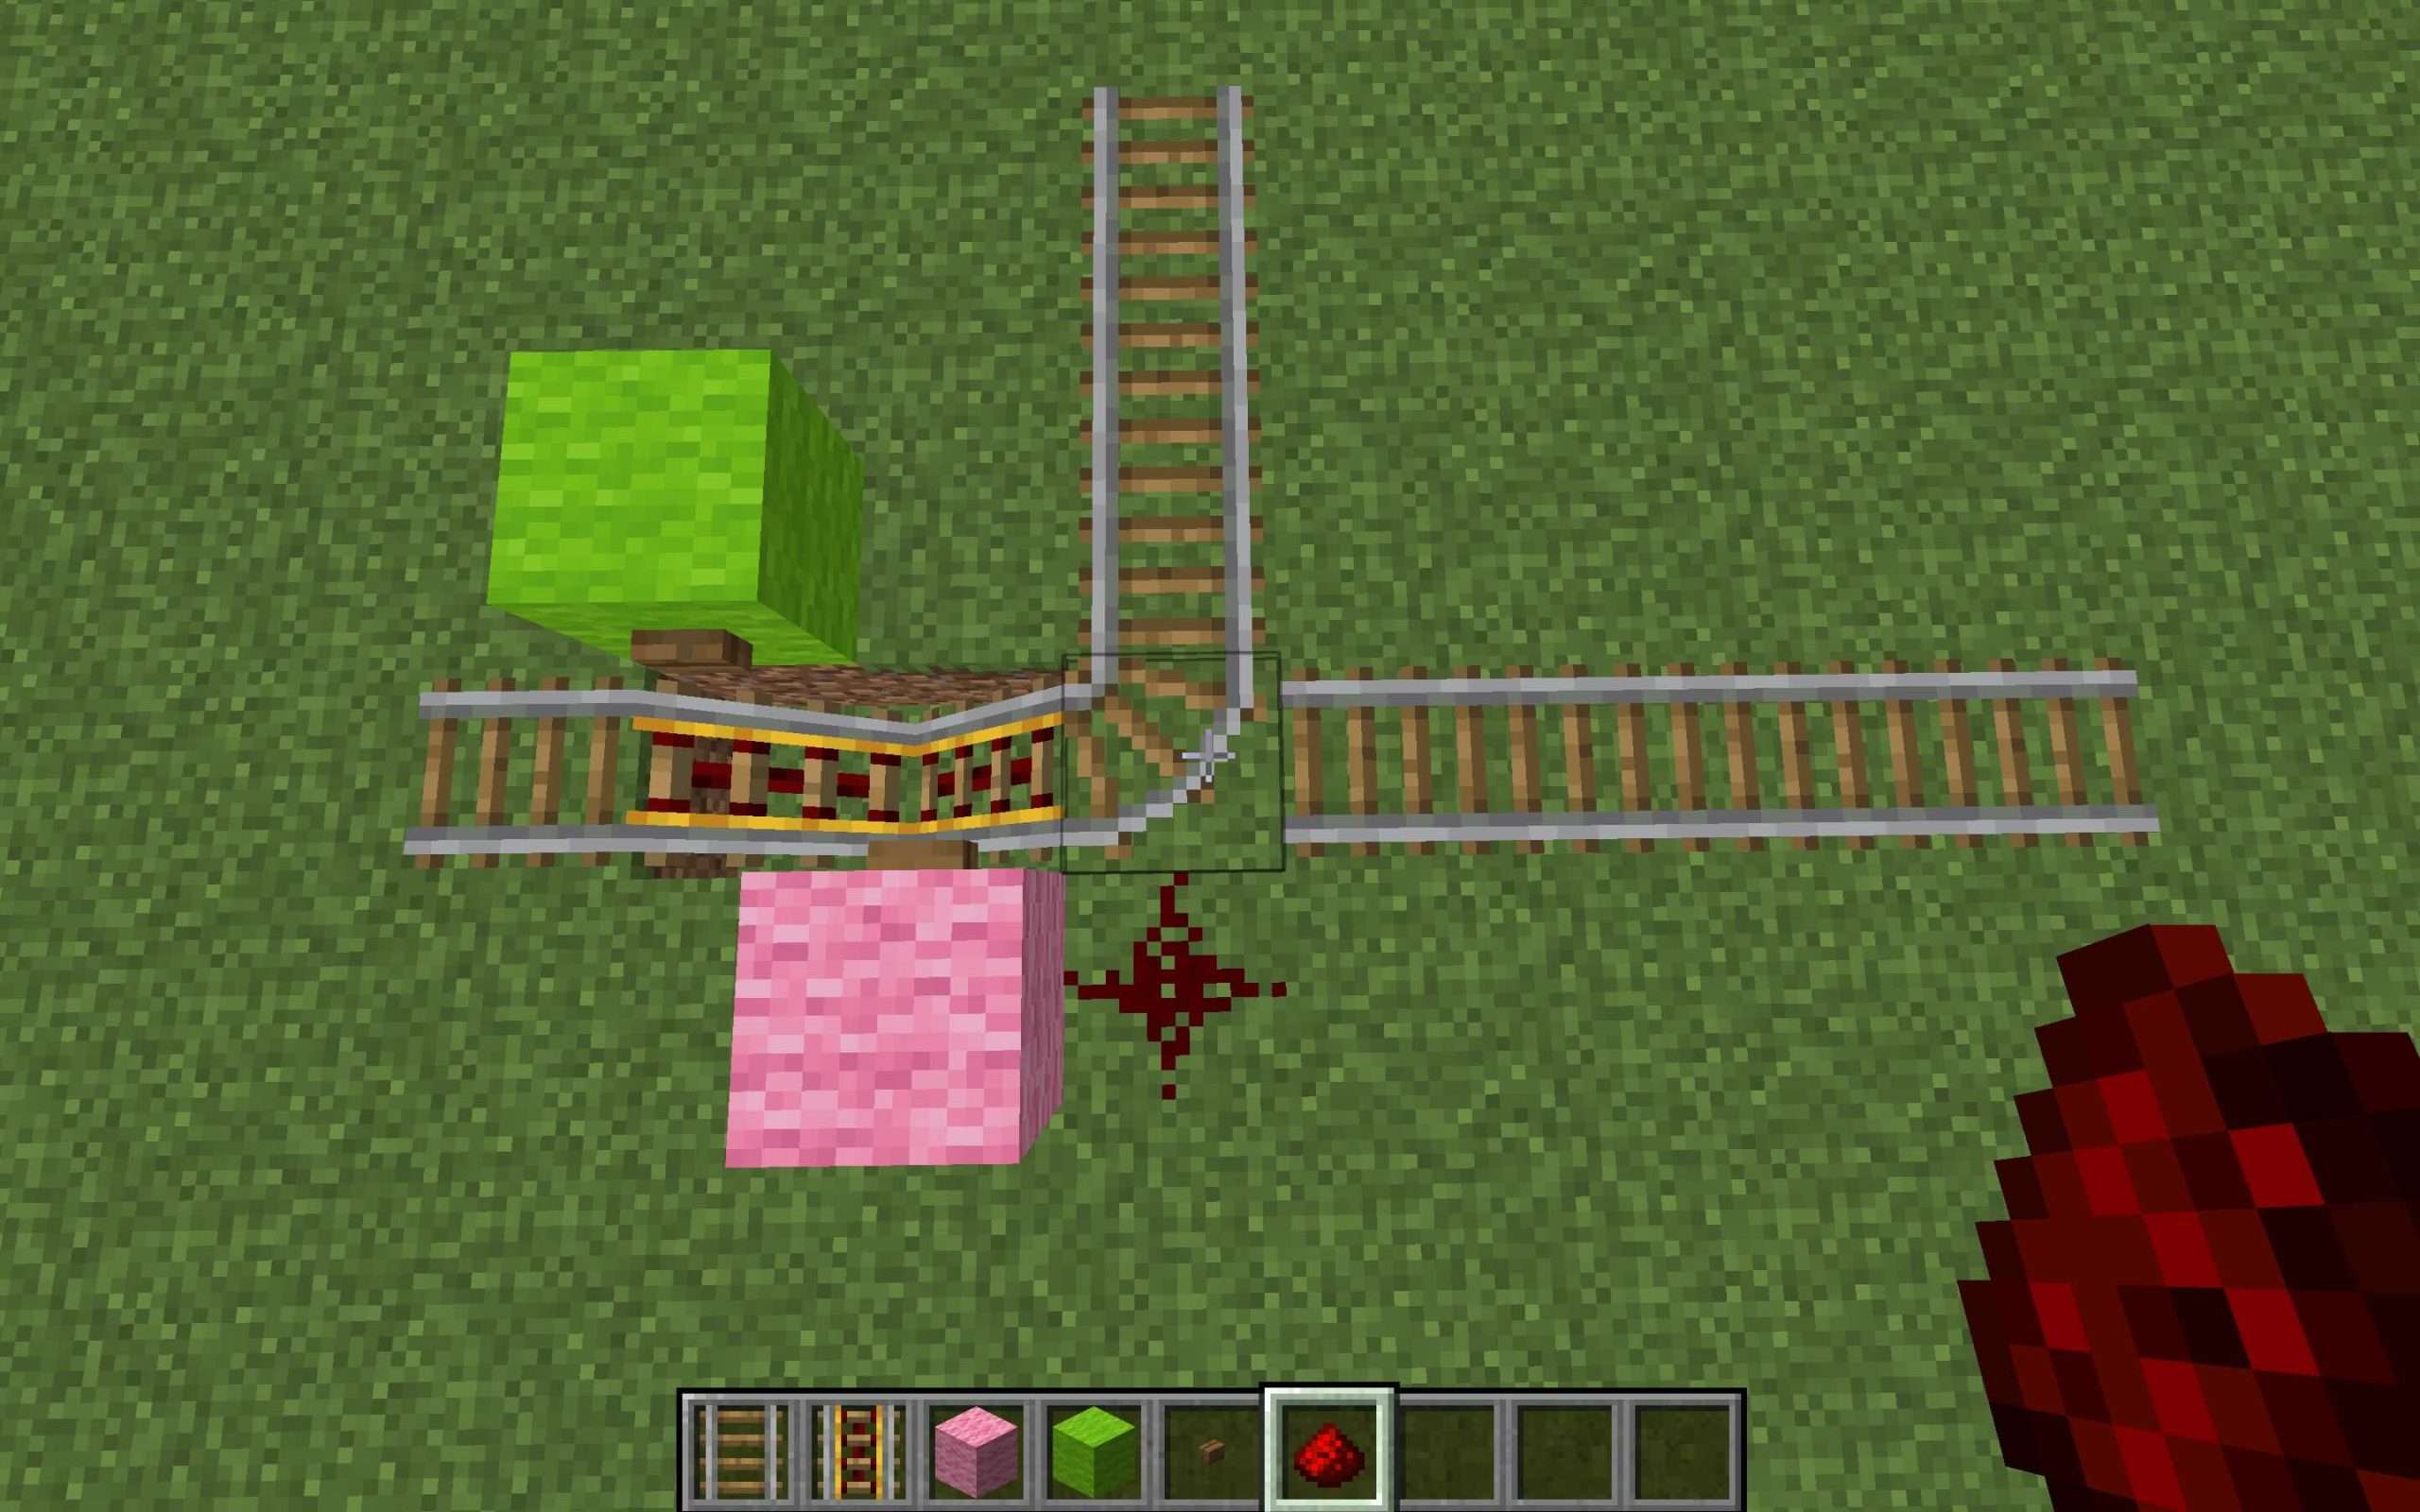
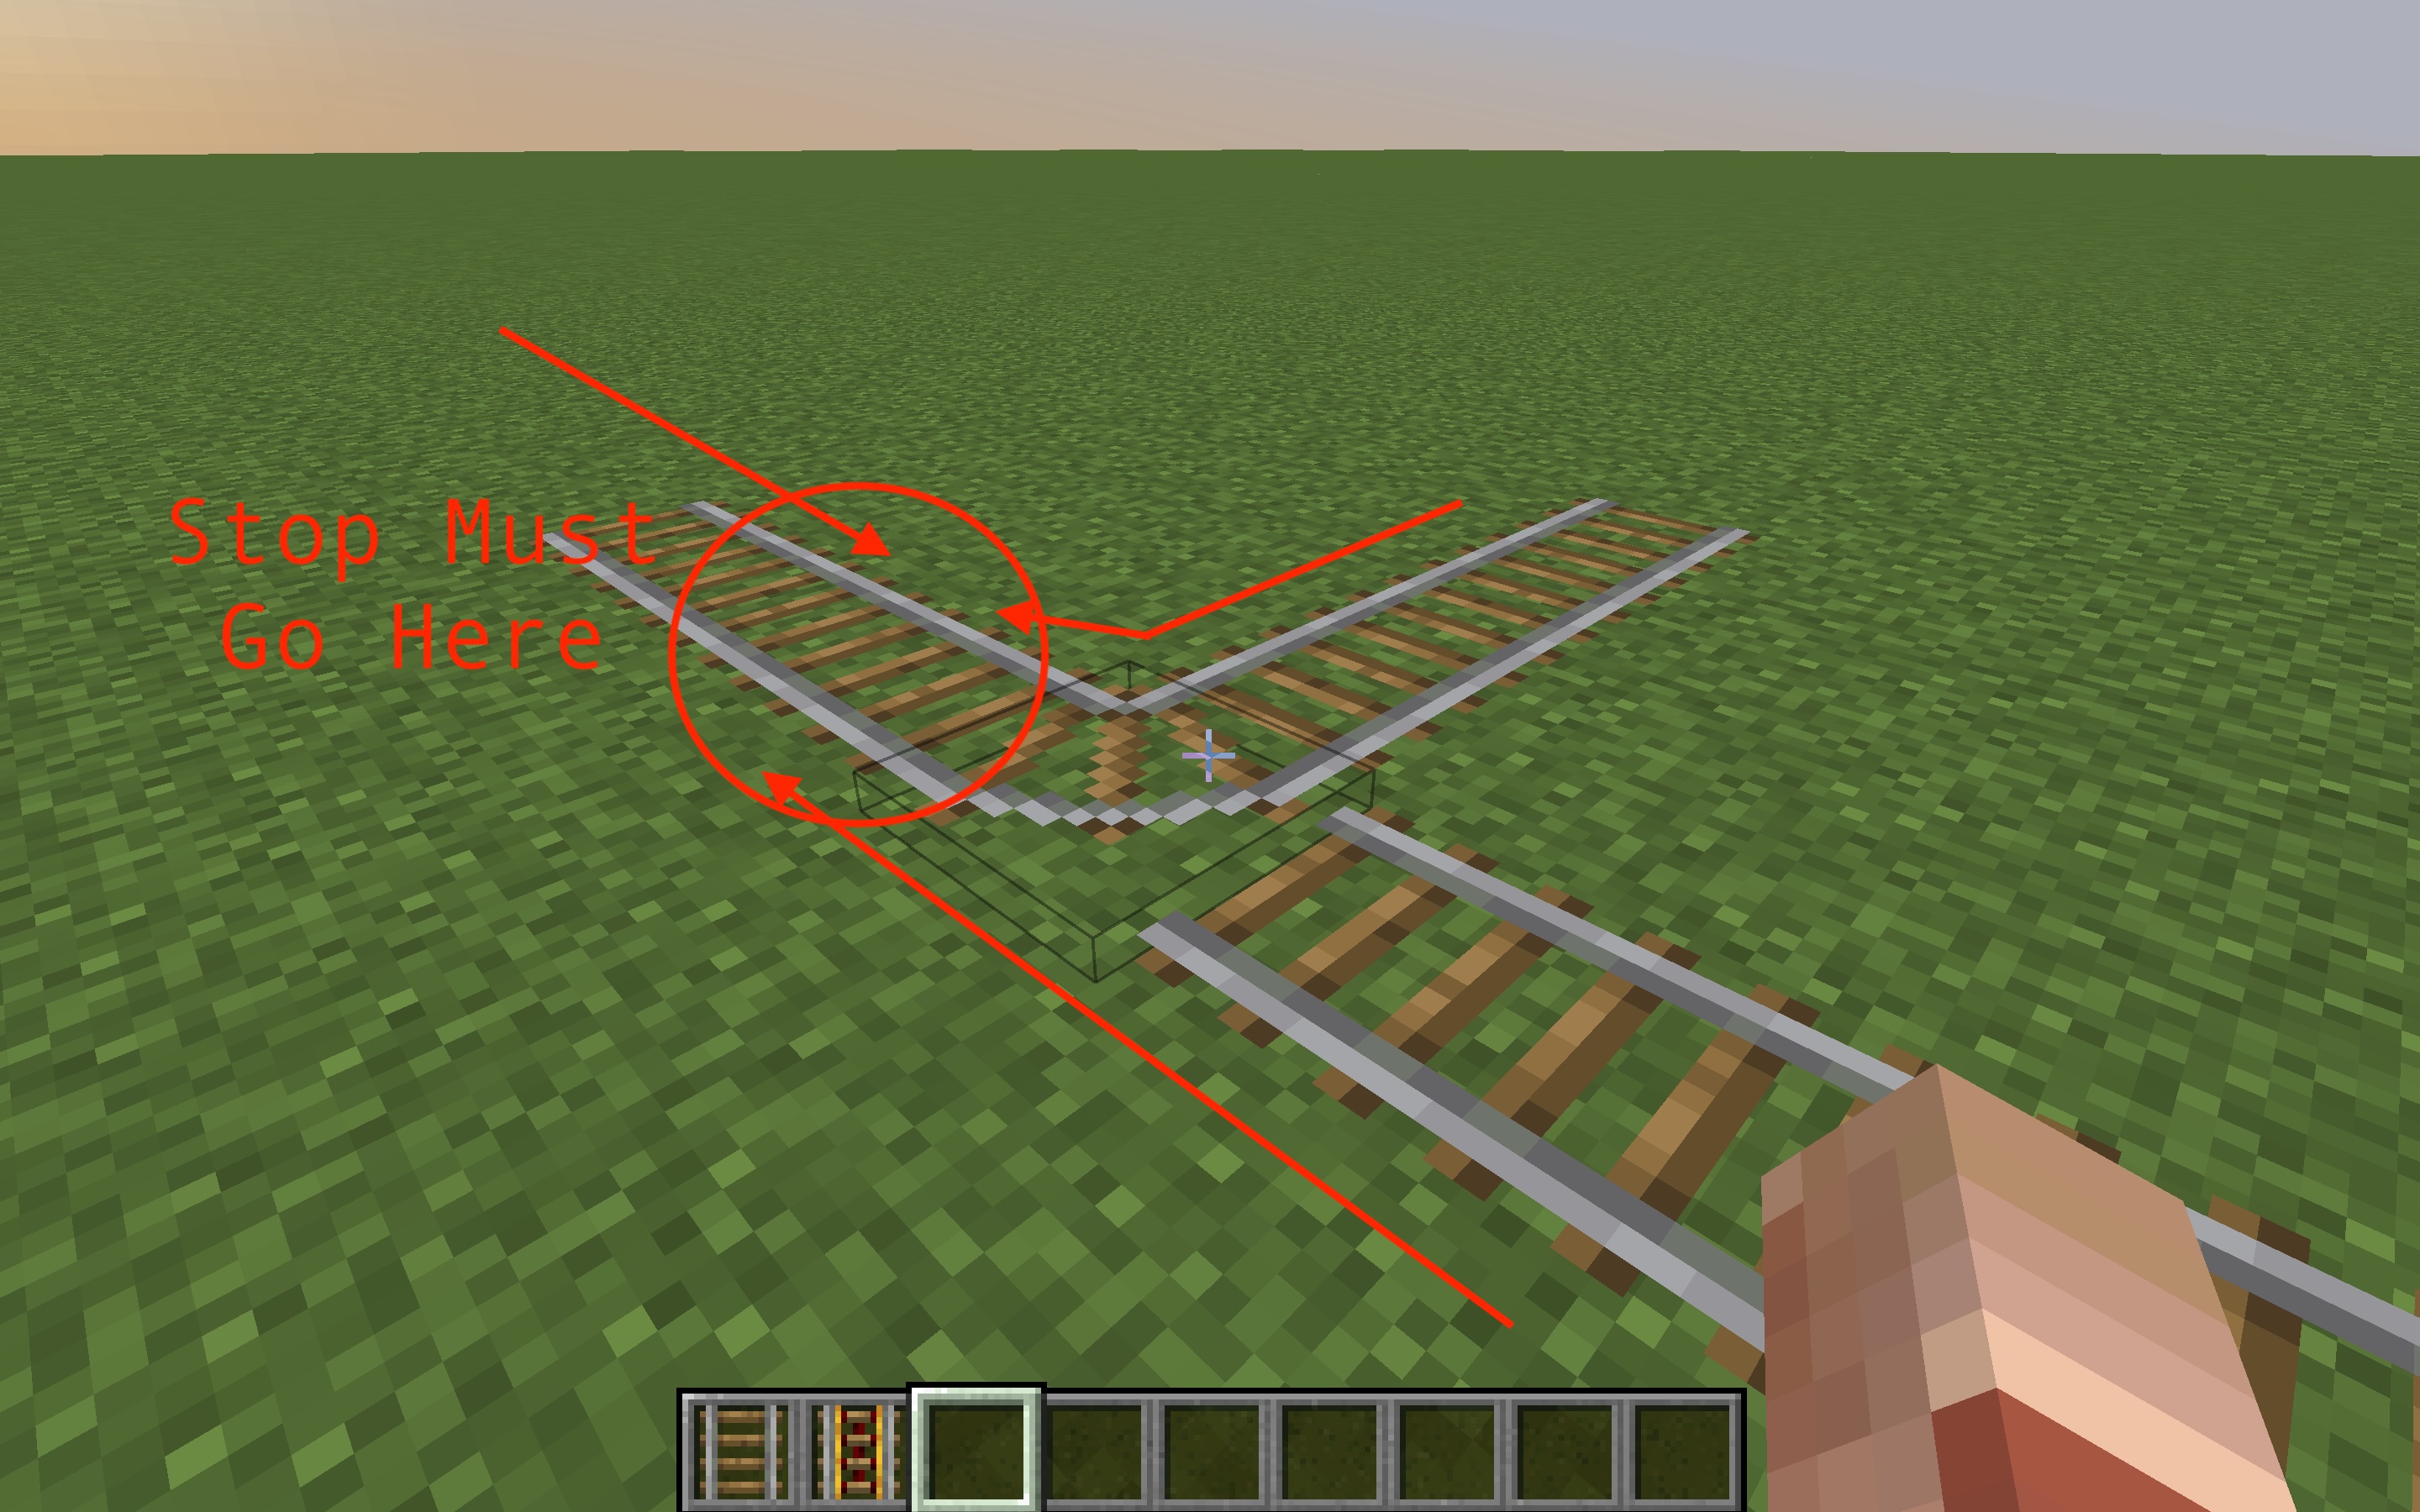
Then, place your Minecraft switch track down. By default, it will always be bent and will never be straight. Use the orientation to determine where to place the stop.
Because that track will never go directly straight, the stop must be placed on the segment of the line where all trains will go. Because of the orientation of the switched track, all minecarts will go by default toward one line like below:
Building the Stop For the Minecraft Railroad Switch
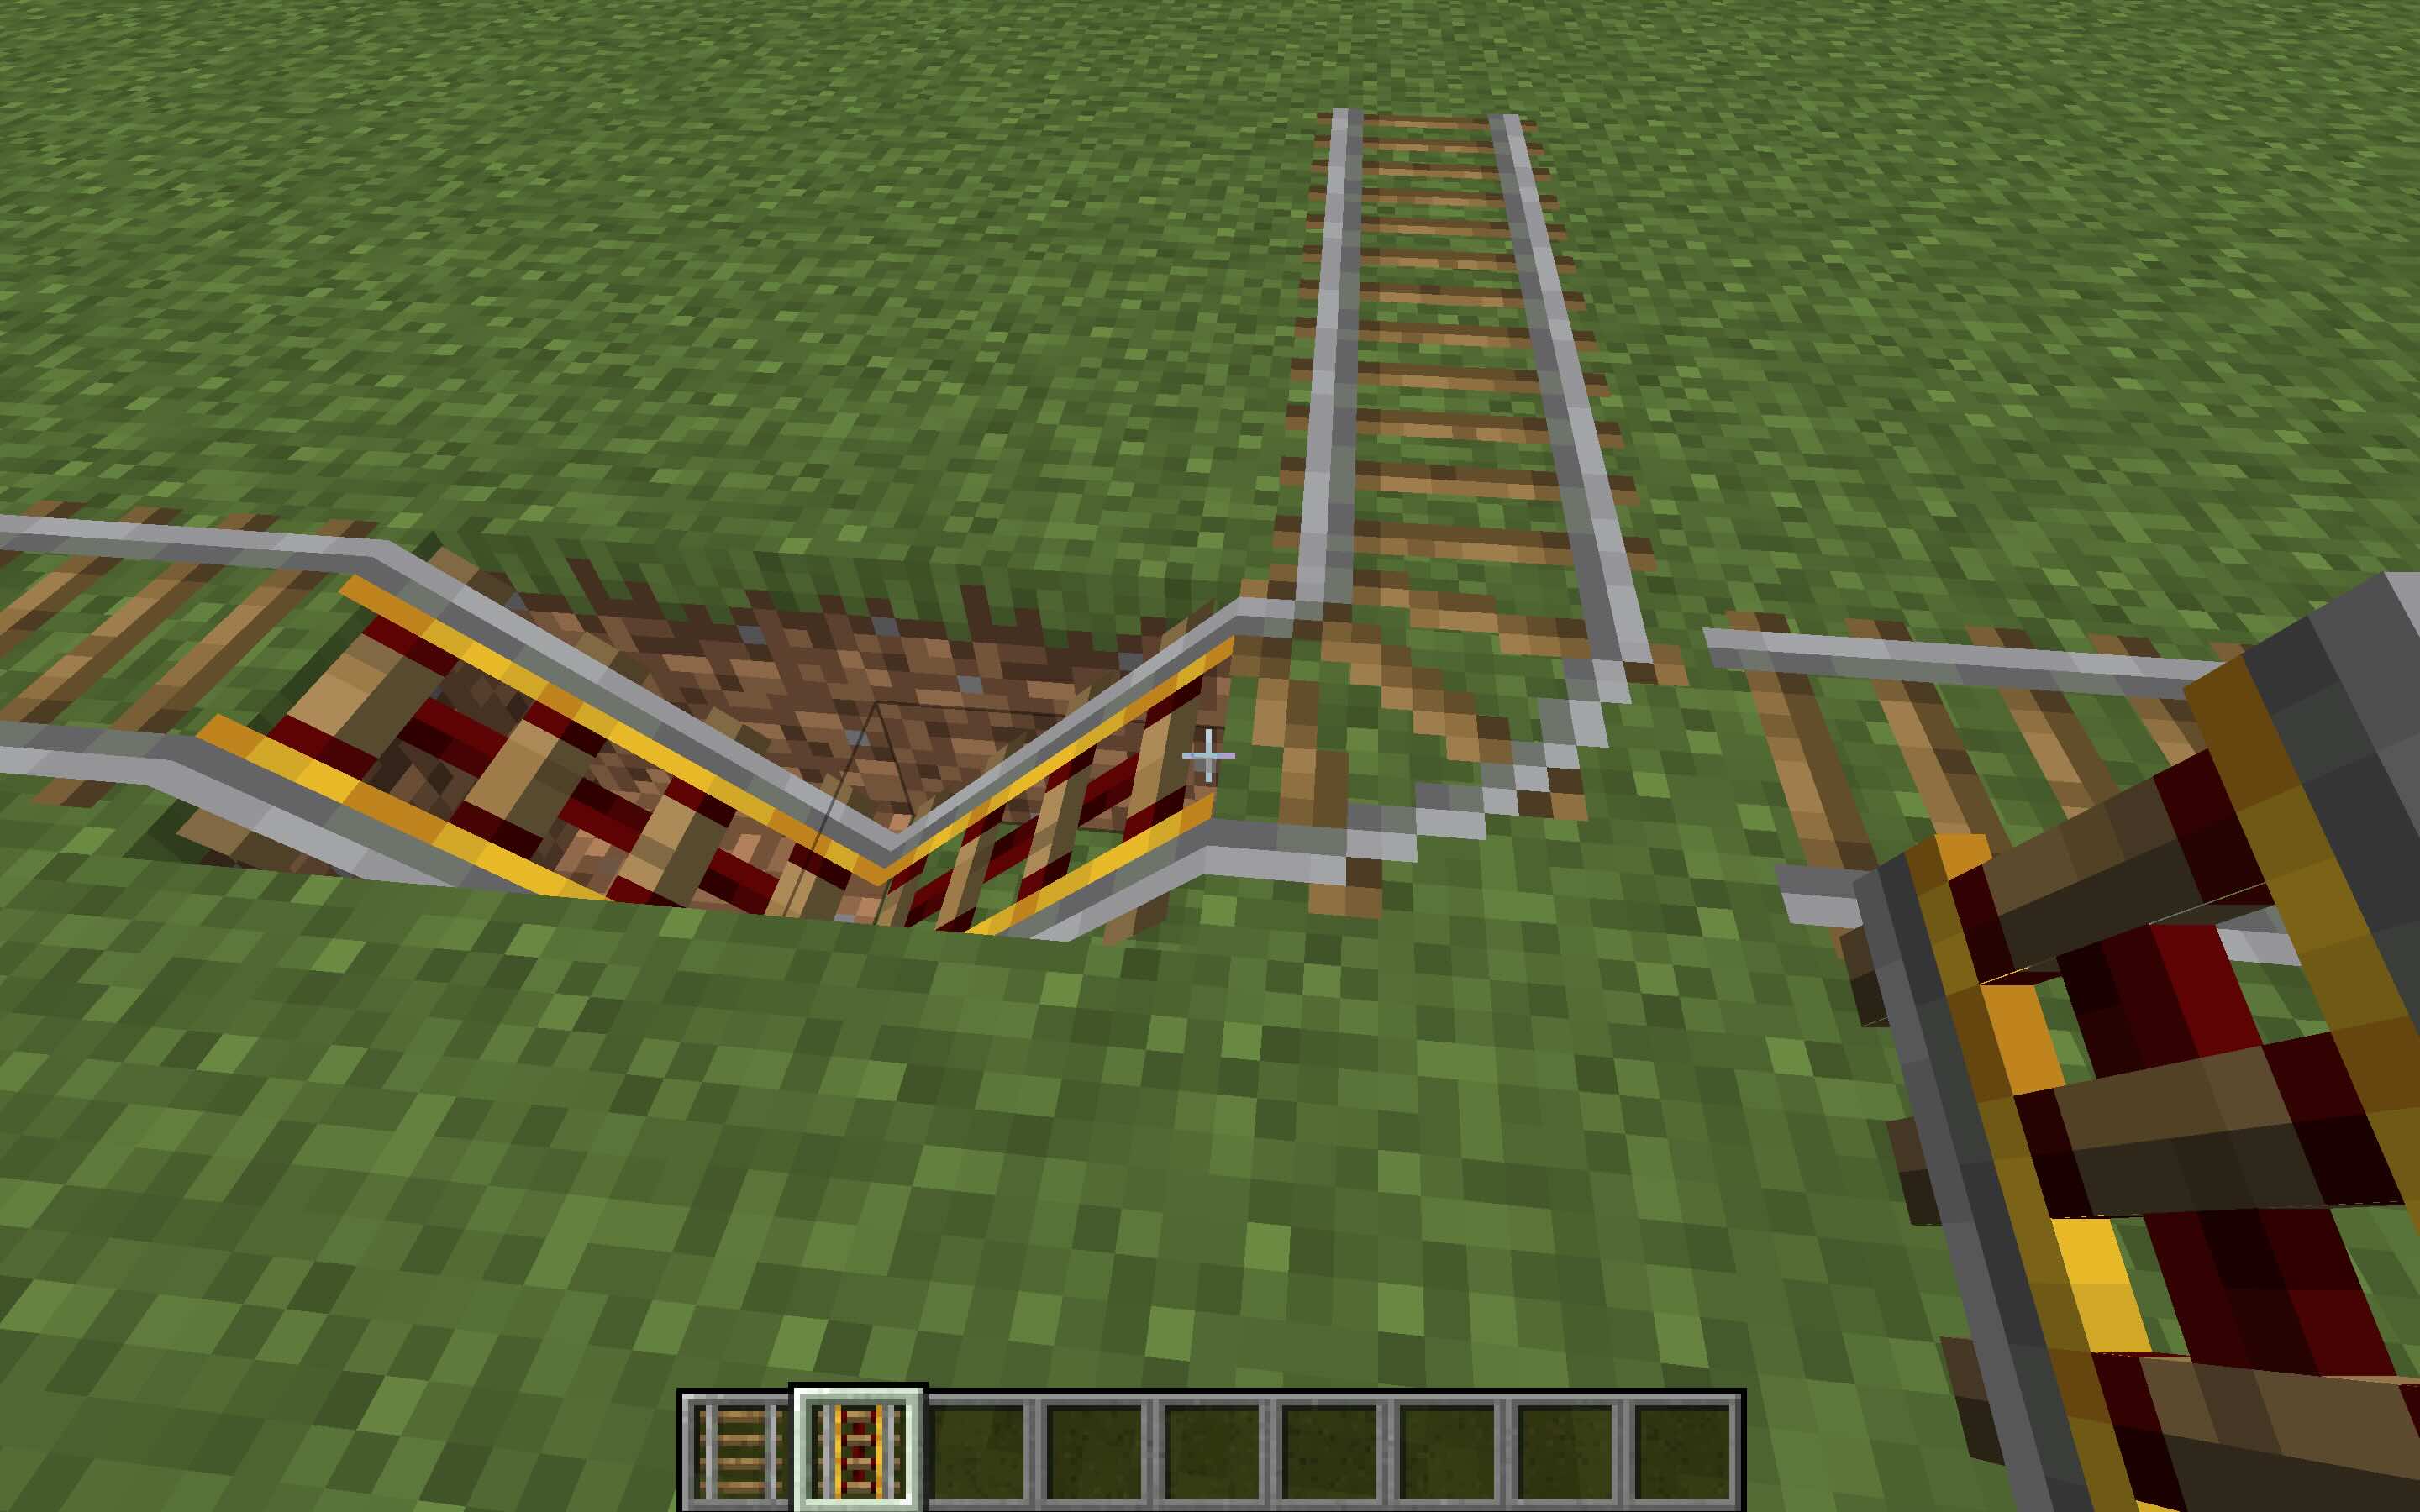
First of all, you will want to create a two-block-wide hole where you want your carts to stop.

Then, you will want to place two powered rails inside the hole. Don’t power them just yet.
Building the Redstone
Place two buttons. I prefer to place the buttons on two different wool colors, one representing the button that moves the Minecart switch and the other the one that doesn’t. I also prefer to use the same color scheme everywhere, as it can be confusing for other players to use the railroad switch if you don’t.
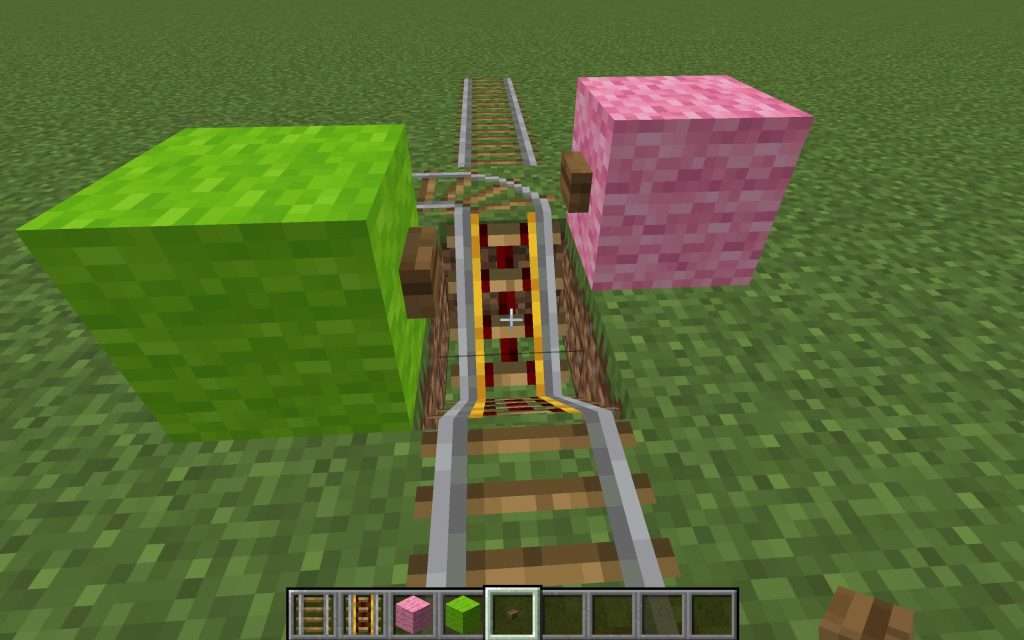
Lastly, place a piece of redstone to ensure the front button activates the switch. This is a critical step for properly operating your Minecraft railroad switch.
Using the Minecraft Railroad Switch
When you reach the stop, always ensure your Minecart is leaning opposite to the direction you want to go.
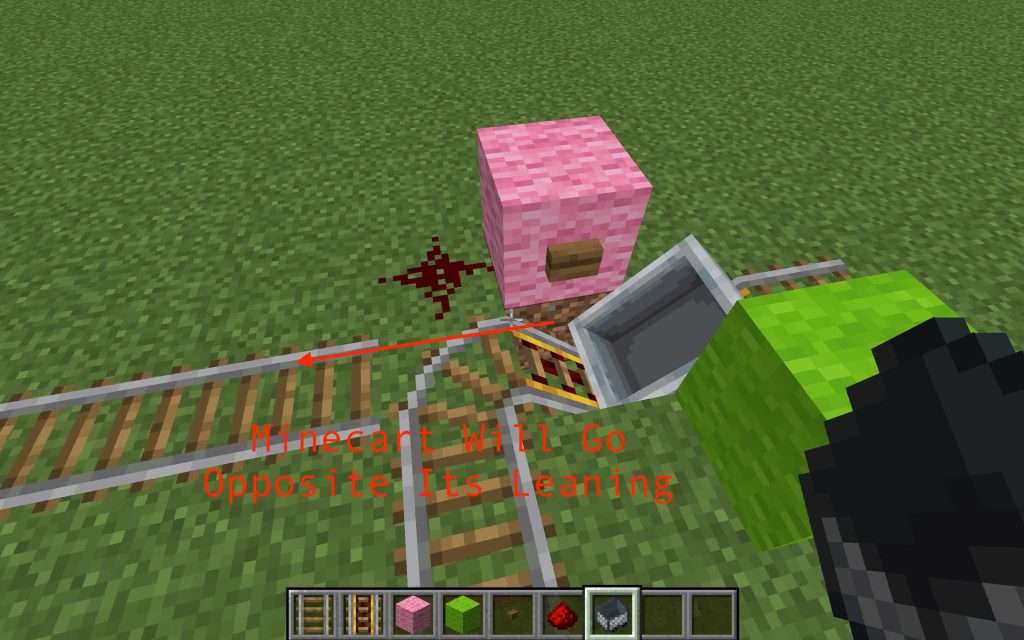
Pressing the front button will activate the switch, and the Minecart will move forward, utilizing the Minecraft railroad switch effectively:
Pressing the back button will not activate the switch, meaning the Minecart will go to the side, its default direction:

Conclusion
This Minecraft railroad switch should enable you to control navigation across a vast network of rail lines. In addition to railroad switches, I will soon be making more Minecraft tutorials about other railroad contraptions to ease creating a network that will get you anywhere in the world.