The Poor Man’s Guide to Making a Supercomputer
How to Make a Personal Supercomputer
So, I did this myself a few months ago and it was incredibly difficult. It was difficult mainly because the websites that I could find on the matter were very vague about how to do it. Also, they didn’t make it easy for people who didn’t have a ton of money to do so. In this tutorial, I am going to be very specific so that you can follow along exactly how I did it, and I am also going to use the computer parts I used, which are all very cheap things that I have no clue why they are so cheap. At the end of the day, your computer will probably look a bit like mine (or maybe even better). Here are my personal supercomputer’s tech specs:
- 72 GB of RAM
- 5 TB of hard drive space
- 3 CPU’s
- Three GPU’s (two of which are NIVIDA GeForce)
- 3 OS’s which run at the same time as each other

What is a Supercomputer?
I could assure you that probably a lot of people reading this are not aware of what a supercomputer is. All most people think of when they hear supercomputer, is simply like a computer but more powerful. That is why I am going to explain what a supercomputer is. A supercomputer is just a bunch of computers that enables the user to divide tasks between them such that only one of the computers in the system gets weighed down by a program running. A supercomputer operates by having one computer set up as a master computer, and any other computers set up as slave computers.

How Technical People Use Supercomputers
A good example for good use of a supercomputer is if somebody wanted to scan a bunch of images for a certain quality, so one computer passes images to the other computers and those computers can check and see if those images possess that quality. However, this is not something that can be used for just people who have to analyze lots of data.
How Normal People can Use Supercomputers
A normal person could use it as well. For example, if somebody wanted to distribute a Minecraft game so it takes less weight on one computer, they certainly can do that. They just need to run a Minecraft server on one computer and run a Minecraft client on another. This, of course, means that if you have a supercomputer, you never have to buy hosting for any type of server again. All you need to do is run a server on one computer. Then, you can simply forward a port on your router and you’re all set up.
How We will be Making our Supercomputer
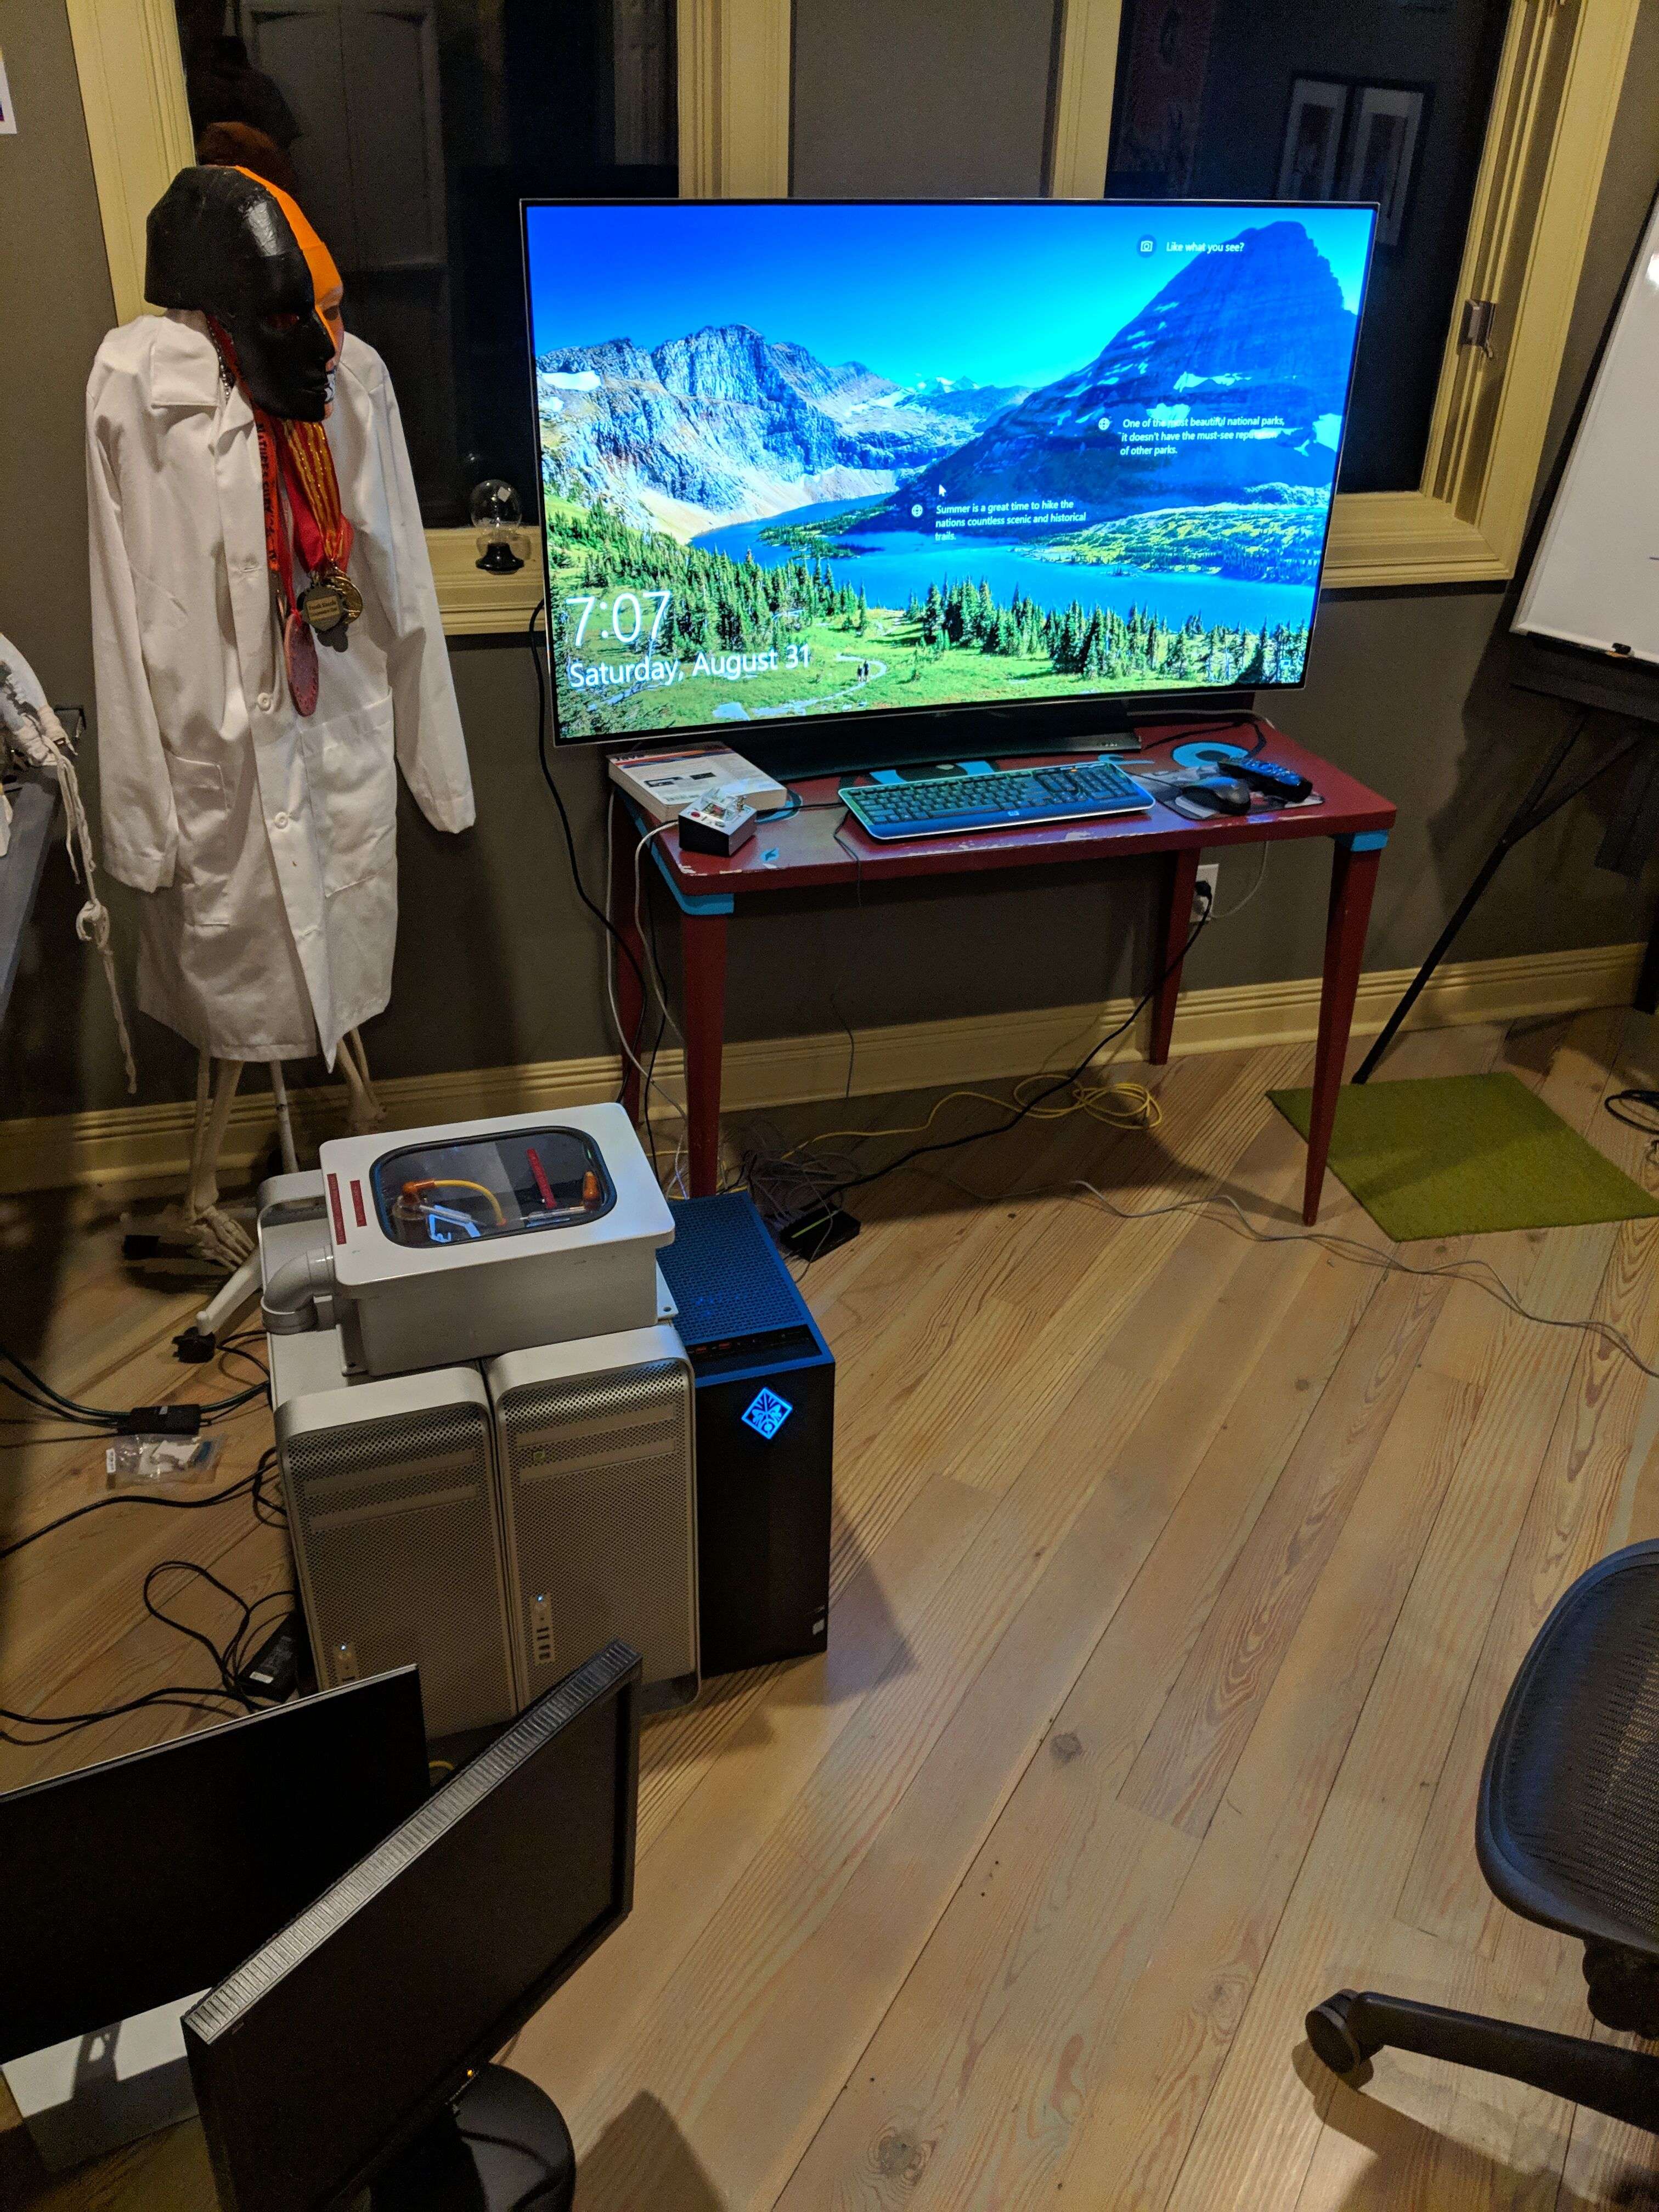
I will use these things to show you how to make a Supercomputer. I recommend the usage of a powerful Windows computer as the master computer. Use something along the lines of an HP Omen. I used an HP Omen for mine, but any powerful Windows computer will probably do. Remember that you will only need one master computer, and this will be the one you will be mainly on. It is important to treat yourself with a good master computer because you will probably experience most of your lag on the master computer. You will much more rarely have lag issues on the slave computers.

For the slave computers, I only have one recommendation and I suggest you go with it. This is a 2008 Mac Pro. Not Macbook Pro. A Mac Pro is a desktop which is made by Apple every few years mainly for purposes of Hollywood video editing. Unlike other Apple computers, Apple turns their Mac Pros up to eleven. They usually make Mac Pros with tech specs that you won’t start seeing on commercial Windows computers for around 7-10 years after the Mac Pro is released.
Mac Pros usually cost around $6,000+ when they first come out, however, for some reason, people online do not think old ones are worth that much. However, Mac Pros from 2008 are roughly as powerful as most modern computers. The average 2008 Mac Pro costs roughly $200. This makes them perfect for being slave computers.

What you Will Need
Here are the supplies which you will need to make a supercomputer:
- A powerful modern Windows computer. (For the master computer.)
- As many 2008 Mac Pros as your heart desires (you can buy them for very cheap on eBay.)
- A router or modem with ethernet capabilities.
- A flash drive with 8+ GB of storage.
- Spare hard drives in case the Mac Pros have failing disks (you can buy them online if they do)
- An ethernet switch
- A monitor which has DVI capabilities (you’ll only need this while the computer is being built, so if you want to borrow it from someone else, that’s fine.)
- Ethernet cables to plug into each computer you will be buying, plus an ethernet cable to plug into your router or modem.
- Willingness to put a little elbow grease into making a supercomputer.
How to Build a Supercomputer
Now, it’s time for the fun part: building the supercomputer.
Setting up the OS in the Slave Computers
For this tutorial, we will be setting the OS for the slave computers to be Ubuntu Linux. If you are tech-savvy and you know another distro to use, feel free to skip this first part and install whatever distro you desire. For everybody else, though, I will show you how to install Ubuntu on the computers.
Installing Ubuntu on the Flash Drive
First, you’re going to want to download the Ubuntu Linux ISO. This is the demo for Ubuntu that you will install on the flash drive to install actual Ubuntu on the slave computers. Now, to install Ubuntu on your flash drive, you must download Universal USB Installer. For instructions on how to install ubuntu on Universal USB Installer, please see It’s FOSS’s article How to Create a Ubuntu Live USB in Windows.
Booting the Flash Drive for Installation
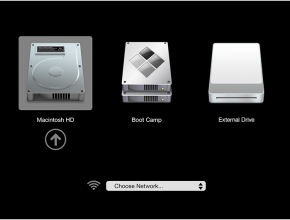
Once the USB has Linux installed, please have the Mac Pros plugged in and ready to boot. Place the USB stick in one of the USB plug-in locations on the Mac Pro. Boot it, and when you hear the chime, press and hold OPTION until a screen pops up with a list of available drives which can be booted. Click on the drive which is named ‘EFI’ (External Firmware Interface), and it should boot the flash drive.
Installation of the Main OS
Once the OS turns on, you can install immediately, or you can play around with the OS for a little while to see how it works. Before you install it, you must first ensure that there is an ethernet connection to the computer from the modem or router so that the computer can download the OS. When you attempt to install, please fill in the required information. When it prompts you about the partition to place Ubuntu in, choose the option which allows you to fully write over the disk. I also recommend that you choose to install updates to the system during system installation. This will save you time afterward. Also, when configuring your user account, ensure that it allows you to log in automatically.
Do note, sometimes SSDs may fail: Not-So-Fun-Fact: SSDs Do Fail
Installing Needed Updates to the System’s Applications
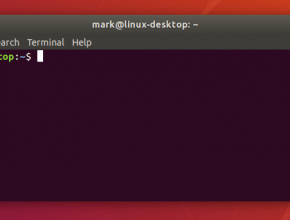
Once the OS is installed, it is as simple as restarting the computer, and the system will be ready to start. When the system starts up, go to the apps. (The icon on the bottom left, which allows you to view all the applications installed on the system). Search for the ‘terminal’. When the terminal pops up, enter in the following system commands:
sudo apt-get update && sudo apt-get upgrade
This will perform any updates which the system had not gotten to during the prior installation of the OS. Please repeat the OS installation process for all of the other Mac Pros which you may have.
Installing a Good GUI
If you’re like me, you don’t like Ubuntu’s default GUI, GNOME. I prefer MATE for my GUI. MATE is also what macOS and Mac OSX uses for their GUI’s. Luckily, unlike with commercial operating systems, Linux allows you to simply install a new GUI and use that. Remember the ‘terminal’ from earlier? We are going to use that application a lot during this process. Open the terminal up again and type the following command to install MATE:
sudo apt-get install ubuntu-mate-desktop
Now that you have installed MATE for the GUI, for MATE to take effect, you must log out. Upon logging out, click on the Ubuntu symbol. This will give you a list of GUI’s to use. Click on MATE. Now, simply log in, and watch the magic happen.
Setting Up an SSH Server
Now, you’re going to want to be able to access that ‘terminal’ that I showed you remotely, which is why you need to install a service called SSH. SSH enables you to remotely log in to slave computers and perform commands on them. It is a very useful service. To install the server software, open up your terminal once again, and type:
sudo apt-get install openssh-server
Now that you have the server installed, you must see if the server is running:
sudo systemctl status ssh
If the command prints this line, in addition to other lines, you’re good to go:
Active: active (running) since [DATE] UTC; [TIME] ago
You will also want to enable ssh on system startup:
sudo systemctl enable ssh
Setting up an SSH Client
Now that you have the server fully running, you should now find a way to connect to it with your master computer. I recommend PuTTY as an ssh client to connect to the slave computers on your Windows master computer. You can get PuTTY at https://www.putty.org/. The website looks a bit old and outdated, but that is because it is software meant mainly for programmers, and that is close to what website code looks like in reality. It’s not pretty, but it works well. Once PuTTY is downloaded, install it.

Connecting to Your Slave Computers
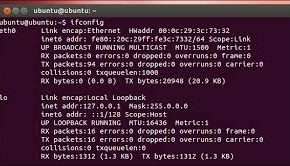
Now that you have PuTTY set up, start PuTTY and it will show a menu. Set the host field at the top to the IP of the slave computer that you set up SSH for. If you do not know the IP, you can enter in the following command on your slave computer’s terminal:
ifconfig
That command will show you a list of internet adapters and their MAC and IP addresses. The one you will want to look for is the one that looks a little bit like enp7s[x]f0 with [x] being the ethernet adapter which currently has the cable plugged in (Mac Pros have two ethernet adapters.)
A Note About Encryption
Now that you know the IP, type that IP in the host field. The port should remain as 22. Click “connect.” It will ask you if you trust this device. This is because the RSA encryption for the device is not certified. As it is on the same network as you, you can trust it. If you wanted to connect to it over a larger internet, you would probably want to get it certified to ensure nobody is tapping in on your commands. I will talk about RSA encryption and certification in a later post.
Logging into Your Slave Computer in a Remote Terminal
Once you have agreed to connect, you can now login with your normal account. When you type in your password, it will be invisible. That is normal for entering passwords in the terminal. You can now access that computer’s shell from your master computer. Now, you must set up a way to transfer your files between your computers in your supercomputer. Now, do the same thing to set up an SSH server on all of your slave computers.
Setting Up FTP (File Transfer Protocol)
You cannot fully create a supercomputer without a good way to transfer files from one computer to another, which is the purpose of FTP. FTP is a service which allows files to be transferred remotely. We will be using a version of FTP called VSFTP, however, you can skip this part and do whatever version you choose to do otherwise.
Installing VSFTP
In order to install VSFTP, you must run the following command:
sudo apt-get install vsftpd

sudo systemctl start vsftpd

sudo systemctl enable vsftpd
Those commands will install, start, and enable VSFTP. Now, you will want to configure VSFTP so it is useful for what you are trying to do. Enter the following command into ssh:
sudo nano /etc/vsftpd.conf
This should open the config file for VSFTP in ssh so you can edit it. Rewrite the following lines to the information below (bright red information may need to be rewritten), (to find a line, press ^W):
anonymous_enable=NO

local_enable=YES

write_enable=YES

chroot_local_user=YES
Now, you will need to save the config file. To save the file, press ^O. That will write the file. Then, press ^X to exit the editor. Now, you must restart VSFTP in order for the configuration file to be applied. Enter in the following command to restart the service:
sudo service vsftpd restart
Now, repeat that process for all of your slave computers.
Installing an FTP Client on the Master Computer
Now, you need a way to access the FTP servers (VSFTP) that you set up on your slave computers so that you can transmit files. In order to do that, you must download and install FileZilla. You can download FileZilla at https://filezilla-project.org.
A Note to Users of Norton Security
NOTE: There is one antivirus, which, for some reason or another, has issues with FileZilla. FileZilla is a reputable FTP client, in fact, it is probably the most reputable FTP client out there. FileZilla is not a virus, and it is used my plentiful programmers all over the world.
The reason that this antivirus has an issue with FileZilla is not that FileZilla is a dangerous program, but because FileZilla uses bundled offers for other programs because it is free software and it has to make money somehow. You can override the security by temporarily disabling your antivirus for a 15-minute period, after which it will return to proper order. Just, be careful when using the installer so that you don’t accidentally install something other than FileZilla. For more information about this, read this article from Bleeping Computer. If you still do not trust FileZilla, I recommend Googling around for another FTP client of your choosing.
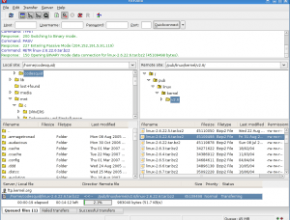
Transferring Files to and from your Slave Computers
After you have installed FileZilla, run it and do the following to attempt to connect to the slave computers. Type in the IP address of the server in the host field. If you do not know it, you can use ifconfig again. Then, enter in your username and password for your slave computer account. This will give you access to your home directory. In order to transfer files, just drag them to and from your computer.
You’re Done!
That’s it, that’s the end. You now have your own personal supercomputer. Now you have the right to brag to your friends about the fact that you have something that most scientific research facilities don’t even have. I will come out with a tutorial later on how to be able to remote access the screens of your slave computers, as that is a whole different story. Now, go run out and play with your new Supercomputer! Seriously, this is the end of the tutorial. That’s it. You’re done now.


Please write soon about how to access the screens of the slave computers using ssh…
I will be doing that soon. I will be having a tutorial on how to make a Java Edition Minecraft Server, and then I will be writing on how to do that, for now, I’ll tell you that it works by using VNC, if that may help you along.
Thank you ColonelUseless.
Unquestionably believe that which you stated.
Your favorite justification seemed to be on the net the simplest thing to be aware
of. I say to you, I certainly get annoyed while people think about worries that they plainly do not know about.
You managed to hit the nail upon the top as well as defined out the whole thing without having side-effects , people could
take a signal. Will likely be back to get more.
Thanks
Hi there, I discovered your web site by the use of Google at the same time as searching for a
similar subject, your site came up, it appears to be like good.
I’ve bookmarked it in my google bookmarks.
Hi there, simply turned into alert to your blog through Google, and found that it’s
truly informative. I’m going to watch out for brussels.
I’ll be grateful in case you continue this in future.
A lot of other folks might be benefited out of your writing.
Cheers!
It’s awesome in favor of me to have a site, which is helpful
in support of my know-how. thanks admin
Howdy! Would you mind if I share your blog with my facebook group?
There’s a lot of folks that I think would really enjoy your content.
Please let me know. Thanks
You may absolutely share this blog with whoever you like! I am always open to new visitors!
If you are going for best contents like I do, only go to
see this site everyday for the reason that it gives quality contents, thanks
It’s a pity you don’t have a donate button! I’d certainly donate to this outstanding
blog! I suppose for now i’ll settle for book-marking and adding your RSS feed to
my Google account. I look forward to new updates and will share this website with my
Facebook group. Chat soon!
Thank you!
This site is somewhat of a hobby for me. I make tutorials here for free, with no ads. I love that I have people that would consider donating, but I do not need donations. As I host this website out of my own supercomputer, I don’t pay any more money for it than a few dollars a month for the domain name. I do not accept donations as I do not need donations, but I really appreciate the thought. Comments like these make my day!
Everything is very open with a precise explanation of the issues.
It was really informative. Your site is extremely helpful.
Thank you for sharing!
Hello colleagues, how is everything, and what you want to say concerning this post, in my view its actually amazing in support of me.
Loving the information on this site, you have done outstanding job on the blog posts.
I conceive other website proprietors should take this internet site as an model, very clean and wonderful user friendly design and style.
Write more, thats all I have to say. Literally, it seems as though you relied on the video to make your point. You clearly know what youre talking about, why waste your intelligence on just posting videos to your site when you could be giving us something enlightening to read?
Wonderful beat ! I would like to apprentice while you amend your site, how can i subscribe for a blog web site? The account aided me a acceptable deal. I had been a little bit acquainted of this your broadcast offered bright clear idea
Hey I know this is off topic but I was wondering if you knew of any widgets I could add to my blog that automatically tweet my newest twitter updates. I’ve been looking for a plug-in like this for quite some time and was hoping maybe you would have some experience with something like this. Please let me know if you run into anything. I truly enjoy reading your blog and I look forward to your new updates.
I used to be able to find good advice from your content.
I’m just writing to make you know what a fine discovery my wife’s girl undergone using your site. She learned many issues, which include what it is like to possess an excellent coaching nature to make other people without hassle learn various extremely tough things. You truly exceeded her desires. Thank you for supplying the beneficial, safe, explanatory and in addition unique tips on the topic to Gloria.