How to Make a Minecraft Server for Free (Java)
How to Make a Minecraft Server for Java Edition Players
Multiplayer in Minecraft has always been somewhat difficult. Unlike other games, in Minecraft Java Edition, you can’t simply just connect to your friend’s world. Especially in Java Edition, multiplayer is incredibly difficult, and oftentimes expensive if you want to play with your friends. Mojang offers Minecraft Realms, which is a simple way to do it, however, it is expensive and it limits your abilities and is slow so Mojang doesn’t waste their bandwidth. However, in this guide, I will show you how to run a Minecraft server for free.
What You Will Need
In order to make a Minecraft Server, there are some things that you will need, however, if you’re reading this tutorial, I assume you already have these things:
- A Minecraft Client
- A Computer
- Control over your Internet Router or Modem
That’s just about it.
Step 1: Download the Server Software
The server software we will be using is Spigot. Spigot is a software which enables you to have a modifiable server without wasting to much speed. Spigot is the best software to use if you’re looking for speed, as well as modifiability. Minecraft server mods are called plugins.
In order to get Spigot, you must build it from its source code. It is a best practice not to trust sites claiming to have Minecraft servers already built. Sometimes they may include viruses. After all, Spigot is a Java program. In order to build Spigot from source, they have made it easy for you. There is a jar called BuildTools that you can download at https://hub.spigotmc.org/jenkins/job/BuildTools/lastSuccessfulBuild/artifact/target/BuildTools.jar. Once you have downloaded the jar, put the jar in a folder by itself, then follow the per-os instructions below.
Windows
Before you run BuildTools, you must download and install git from https://github.com/git-for-windows/git/releases/latest. Install git, then, if you haven’t already, install java from https://www.oracle.com/technetwork/java/javase/downloads/jre8-downloads-2133155.html. BuildTools requires Java 8 to run. On Windows, you have to install Java 8. Once Java 8 and Git are installed, run the following command in cmd:
java -jar BuildTools.jar --rev [SERVER VERSION]
That command will build the spigot jar file.
Linux
Before you run BuildTools, on Linux you have to have a java installation and a git installation. I am optimizing this tutorial for Ubuntu Linux. In order to install java and git, please type:
sudo apt-get update && sudo apt-get upgrade

sudo apt-get install git

sudo apt-get install default-jre
Unlike on Windows, on Linux, Java 8 is not required unless you are installing an old version for a Minecraft server. Once those are installed, cd into the directory which you have the BuildTools.jar in, and run the following commands.
git config --global --unset core.autocrlf

java -jar BuildTools.jar --rev [YOUR MC VERSION]
That command will build spigot for your version of Minecraft in which you wish to play on.
Step 2: Run First Time and Accept the EULA
First, move the spigot jar file that BuildTools generated into another folder, which for now we will call Minecraft_Server. Note that you can name this folder whatever you wish to call it. Now, we need to create the script which starts the server. This is where we must split the tutorial up by OS.
Making the Startup Script on Linux
On Linux, making the startup script is very simple. Just type in the following commands:
touch start.sh

chmod +x start.sh

nano start.sh
This will open an editor where you can type in the data for the server. Type the following lines of code in the editor:
echo Starting Minecraft Server...

java -Xms[MINIMUM RAM]M/G -Xmx[MAXIMUM RAM]M/G -jar spigot-[MC VERSION].jar
Basically, where it says [MIMIMUM RAM], put the minimum amount of allocated memory for the jar file in. In the [MAXIMUM RAM] field, put the maximum amount of memory you wish to allocate to the Minecraft server. M/G stands for whether the amount of ram specified is in Megabytes or Gigabytes, respectively. If either of these numbers is not enough or too much, depending on the computer, it will crash the server. Be careful when selecting these numbers. Here is what I prefer to use:
java -Xms512M -Xmx6G -jar spigot-1.14.4.jar
Now, you must run the Minecraft server in order to agree to the EULA so you can fully have a Minecraft server. A EULA is basically the agreement which Microsoft has so that they can optimize the amount of money they can make with the game and keep the community in check. They do not enforce it much, but there is an occasional crackdown. To save you time for reading a legal document, here are the basics:
- You cannot make an excessive amount of money by running a Minecraft server. You can accept donations in order to pay for hosting and if you have to, earn enough money to live. However, you cannot force people to pay to access your Minecraft server. It must either be on a non-paid whitelist or public basis.
- You cannot do anything which gets in the way of Microsoft and their improvement of Minecraft. “Improvement” is debatable, some people say they do not like it. I will not pick a side.
- You must follow all the laws of your residence, but also the United States if you don’t live there because that is where Microsoft is located.
- Don’t take this list as definite rules that absolutely determine what Microsoft will do. The best advice is don’t do anything you think Microsoft won’t like or will interfere with Microsoft’s endeavors to make money.
That’s basically it. In order to agree with the EULA, you must enter in the following command in order to edit the eula.txt file:
nano eula.txt
Now that you are in the editor, change eula=false to eula=true in order to accept the EULA. Then press CONTROL+O, to save, then, CONTROL+X to exit the editor.
Ensuring the Minecraft Server Stays Running
In order to ensure the Minecraft server stays running, as it will time out, you must install GNU Screen. To do so, enter in the following commands:
sudo apt-get update && sudo apt-get upgrade

sudo apt-get install screen
This will install needed updates as well as install screen. In order to run the Minecraft Server and access the console, run the following command:
screen -mS "Minecraft Server" ./start.sh
That will start the server, then your world should run well. To detach the screen, type CONTROL+A+D. This will bring you back to the console, but keep the server running. To reattach the screen, type screen -r.
Making the Startup Script on Windows
Luckily for you, Windows is a bit easier. On windows, create a file called start.txt. Then open the file in your preferred text editor and type in the following:
echo Starting Minecraft Server...

java -Xms[MINIMUM RAM]M/G -Xmx[MAXIMUM RAM]M/G -jar spigot-[MINECRAFT VERSION].jar
Please see the Linux section if you are unsure what to put in the sections with the brackets ([]). Now, rename start.txt to start.bat. Now, double-click on start.bat. It should run the Minecraft Server and generate eula.txt for you. Open eula.txt in your preferred text editor and change eula=false to eula=true.
Now, double click on the start.bat again and the server should start up all well and good.
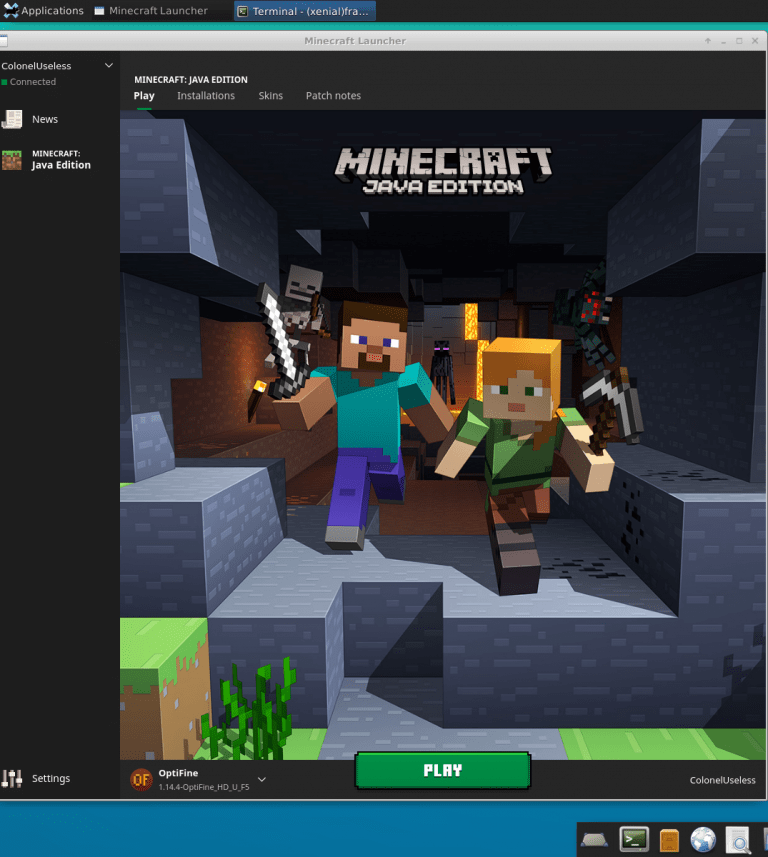
How to Play on Your Minecraft Server
Open up your Minecraft launcher. Make sure you launch Minecraft in the same version as the server. Click on Multiplayer. Click on “Direct Connect”. If you’re on the same computer as the Minecraft Server, type in 127.0.0.1 in the address field. If you’re on a different computer, you may have to do a little digging. Play the game. You probably will need to OP yourself in order to administrate the server. To do that, in the Minecraft Server console type op [YOUR MINECRAFT USERNAME]. This will allow you to administrate your server. In order to play with people that are not on the same network as you, you will have to port-forward your router or modem. Unfortunately, there are so many routers that I cannot provide tutorials on all of that. Instead, go to https://portforward.com and search for your router brand. Enjoy your Minecraft Server! I will have further tutorials on configuration and plugin soon.


I am about to get some MINECRAFT!!!!!!!
Go get yourself some of that Minecraft!