How to Enable Syntax Highlighting in Mac Terminal
For a new tutorial, see How to Install and Configure ZSH for Syntax Highlighting. This also works for other platforms like Linux and BSD.
How To Make Your Mac Terminal Have Syntax Highlighting like Linux
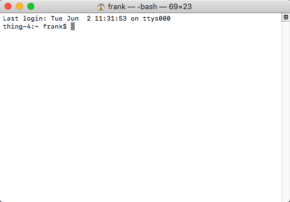
Mac has a pretty bad wrap amongst more tech-savvy people. However, Mac is absolutely an Operating System that can be used by power-users. Mac is based on UNIX, and because of that, practically anything that can be done on UNIX can be done on Mac. However, one thing Mac is bad at is having a good Terminal. The Mac Terminal starts you off with a plain white theme.
However, there are plenty of different themes you can use with your Mac terminal if you go into the terminal preferences, with COMMAND+,. I prefer to use theme Pro. Pro is a good Terminal because it’s see-through, has a black background, and doesn’t make things look more complicated than they actually are like the green and black Homebrew theme. It is Pro that I used to configure the Mac terminal to have syntax highlighting, and I recommend you use it too.
What I Did
The way I set this up is pretty simple. I started by setting Pro as the default Terminal theme. Then, I used a slightly modified version of the Ubuntu bashrc, and used it as the bash_profile, which is Mac’s version of bashrc, and replaced that. That gave me the cool colors that you get with Ubuntu and some other Linux distros.
Tutorial
Alright, here’s the tutorial on it. This is a fairly easy tutorial, but it assumes you already know at least a little bit about how to use the command line. You probably wouldn’t be trying to do this tutorial unless you wanted to improve your command line, which would be useless if you have never used it. So, without further ado, here’s the tutorial.
Setting the Terminal Theme (Optional)
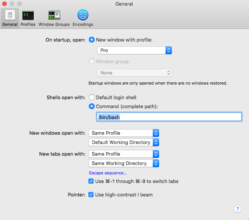
To start off with, you will want to set up the Terminal theme. Start by opening up your terminal, and pressing COMMAND+,. This will open up the Terminal preferences. In the image below, these are the settings I use in the General section. This is really the only section you need to modify. You don’t have to do this, but I recommend doing it.
Setting Up Color Coding
Now, you will want to download a file. This file is a slightly modified version of the Ubuntu bashrc. Make sure that when you download it, you put the file in your Downloads section.
Now that you are done with that, you will want to open up your terminal and paste and execute the following command:
mv ~/Downloads/bash_profile ~/.bash_profile && chmod +x .bash_profile
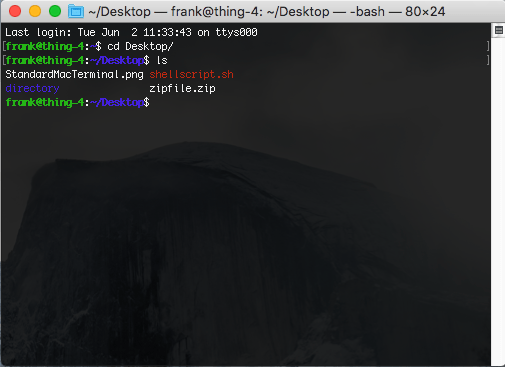
And now, all you have to do is restart the terminal, and you’re all good. It’s colorful and beautiful as ever!


Hey, thanks for the tutorial but it just messed up my terminal. How can I undo these changes ? Thanks
Please join the Discord server for support. I’ll take a look and see what I can do.
For me there was a file ~/.profile which adding ~/.bash_profile overrode. This broke NPM for me, but the problem is reversible. Adding the stuff from .profile to .bash_profile would probably work, or vice versa (have not tried yet).
Thanks! Added a note.
Actually, what I got after moving the downloaded file and restarting terminal is:
/Users/user/.bash_profile:19: command not found: shopt
/Users/user/.bash_profile:27: command not found: shopt
\[\e]0;\u@\h: \w\a\]${debian_chroot:+($debian_chroot)}\[\033[01;32m\]\u@\h\[\033[00m\]:\[\033[01;34m\]\w\[\033[00m\]\$
No change in interface.
Guess it’s not right…