How to Have a Live Dynamic Map of Your Minecraft Server
How to Install Dynmap on Your Minecraft Server
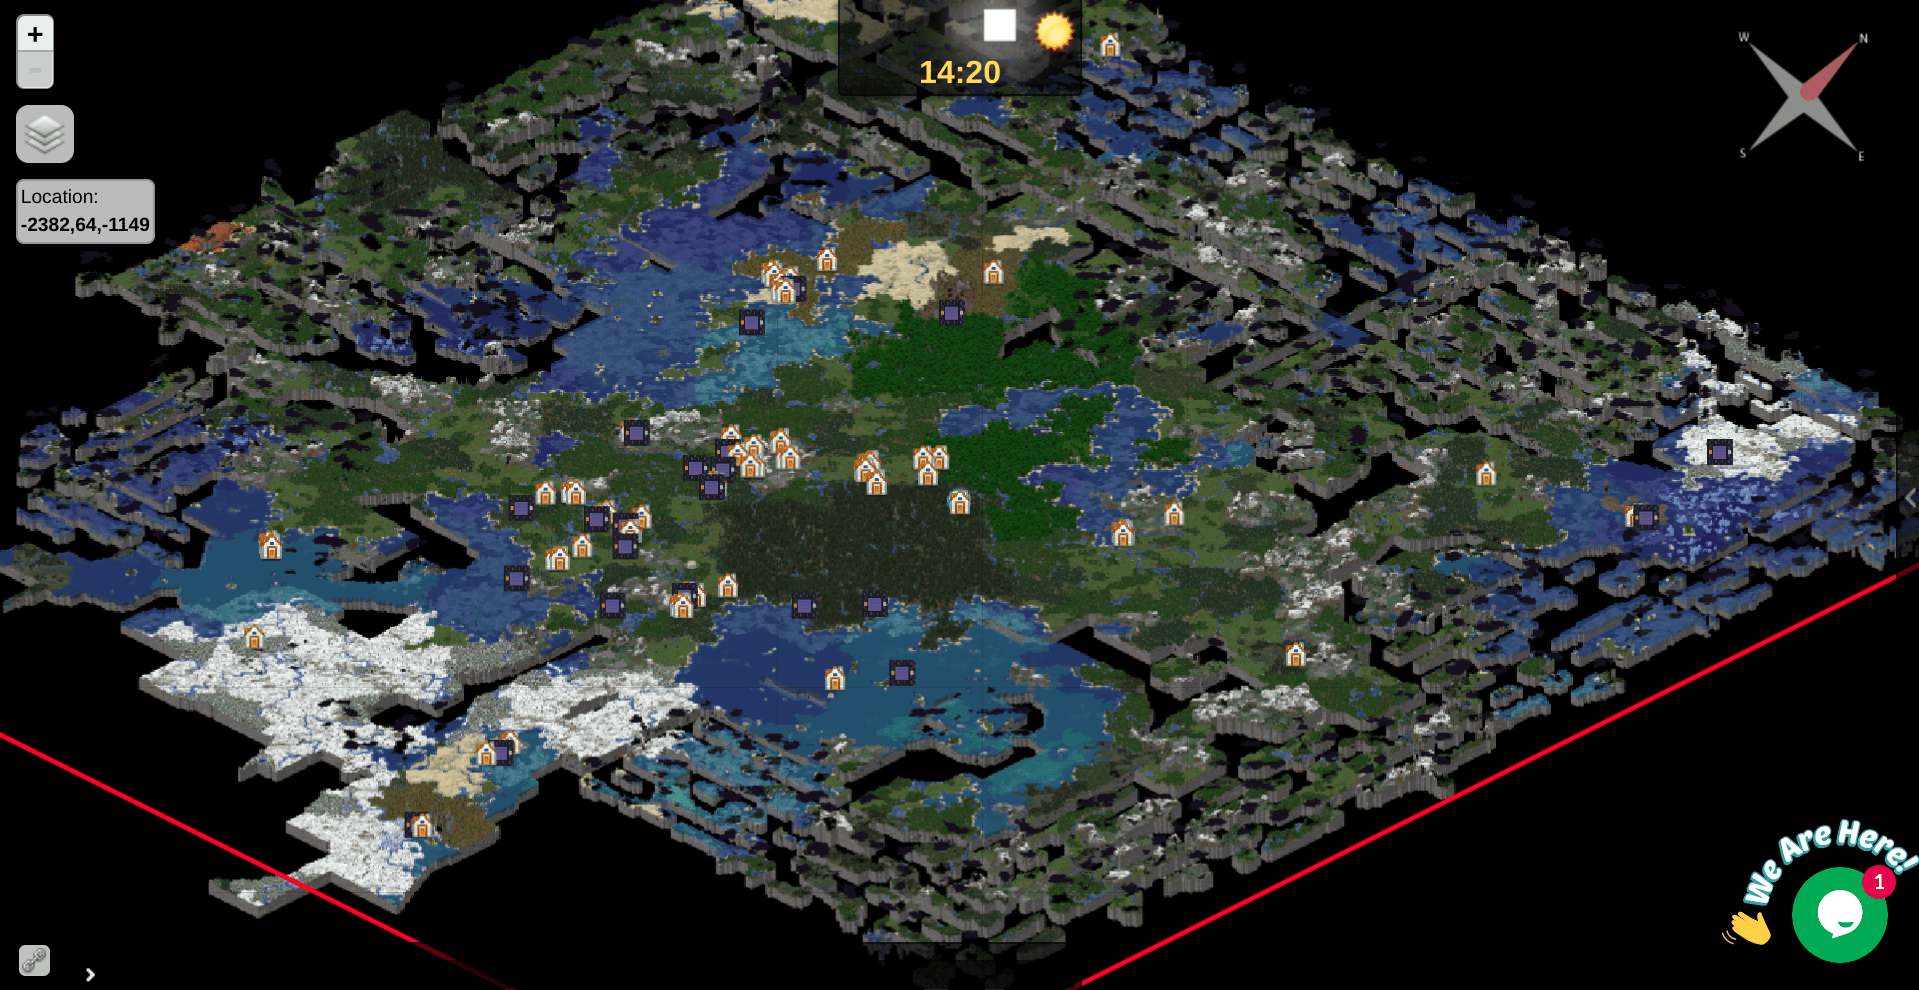
My friend showed me a truly interesting thing that he created with his Minecraft server. He had created a live map that showed the locations of every player as well as two-dimensional and three-dimensional versions of the map of the server. In this tutorial, I will show you how to do exactly that. It is a useful tool to get people interested in your server, and it is also a neat utility for players to explore the world around them.

What You Will Need
There are several things that you will need before running Dynmap on your Minecraft server:
- A Spigot, Bukkit, or CraftBukkit Server (See our guide, How to Make a Minecraft Server for Free (Java) on how to create your own Minecraft server).
- Access to forward ports on your firewall so you can forward the port to your map.
- A very good computer running the server because dynmap can cause a lot of lag otherwise.
- An internet connection
Tutorial
Now that you have gotten what you need, go to https://www.spigotmc.org/resources/dynmap.274/ and download the plugin file. Now, place the file you have just downloaded in the “plugins” folder of your Minecraft server. Once you have done that, go ahead and restart the server. Now, it’s time to configure dynmap.
Configuration
Dynmap has a somewhat odd configuration system. From your Minecraft server root directory, cd into plugins/dynmap/. Then type the following command:
nano configuration.txt
This will open an editor for the configuration. Go ahead and pick the values that you see fit for your server. However, I recommend that you start everybody out with the 3D map. Go ahead and set this value:
defaultmap: surface
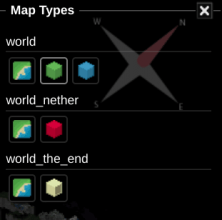
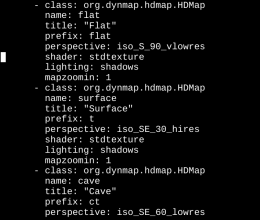
Every server is different and it will ultimately depend on what your community is interested in and the features of the server. Now, it is time to edit which maps will be rendered. These are my recommended values but, then again, it changes depending on the server. Nano the worlds.txt file. Set the text going after “maps:” to this:
maps:

- class: org.dynmap.hdmap.HDMap

name: flat

title: "Flat"

prefix: flat

perspective: iso_S_90_vlowres

shader: stdtexture

lighting: shadows

mapzoomin: 1

- class: org.dynmap.hdmap.HDMap

name: surface

title: "Surface"

prefix: t

perspective: iso_SE_30_hires

shader: stdtexture

lighting: shadows

mapzoomin: 1
Now, you are done with the configuration. Next, it’s time to render the maps.
Rendering Maps
Map rendering is a slow and somewhat annoying process. It is best not to even tell your users that the server exists until you have at least a little bit rendered. It is even better that once you do that, to say that it’s in beta and will be a little buggy. Here’s the command to render your maps:
/dynmap fullrender world world_nether world_the_end
Obviously, if you have more worlds than just the overworld, nether, and end, you will want to put all of them on that list. Once you are done with that, all you need to do is wait. Depending on the world size and what you set your resolutions to, it may take a long time. On my server, it took about a week to fully render. But, once you are done, you and your users can enjoy a live, interactive map of the server! I would like to thank my friend, Tre, for teaching me how to use this awesome utility.

Sorry for the late response, hope you’re still listening. I use Jax Lite for my theme. It’s a really great theme and all of the other themes seem way too cluttered. I like Jax Lite because of its simplicity.
Thank you for sharing your thoughts. I truly appreciate your efforts and I am waiting for your further write ups thank you once again.
Howdy! I could have sworn I’ve visited this blog before but after browsing through some of the articles I realized it’s new to me. Regardless, I’m certainly delighted I stumbled upon it and I’ll be book-marking it and checking back frequently!
Howdy just wanted to give you a quick heads up. The text in your article seem to be running off the screen in Opera. I’m not sure if this is a formatting issue or something to do with internet browser compatibility but I figured I’d post to let you know. The design look great though! Hope you get the issue solved soon. Kudos