

How To Optimize Minecraft 1.17-1.18.2 for M1
Mojang changed the internals of the game a lot in 1.17. The most important internal change they made was that they switched the minimum required Java version to Java 16. However, because they did that, the strategy for optimizing Minecraft for M1 also changed. This tutorial will show you how to optimize Minecraft 1.17 or 1.18.2 for M1. If you want to optimize 1.16.5 or below, see the other article: How To Optimize Minecraft for M1 (Java Edition). If you wish to optimize Minecraft 1.19 and above, please see: How to Optimize Minecraft 1.19 for M1.
Step 1: Install MultiMC
Like 1.16.5 and below, MultiMC must be installed. First, Download MultiMC from their website. Go ahead and extract the tar.gz file and move the MultiMC.app file to your Applications folder in the Finder. Don’t start it just yet. We still need an M1-optimized JDK.
Step 2: Get an M1-Optimized JDK to Optimize Minecraft 1.17 for M1
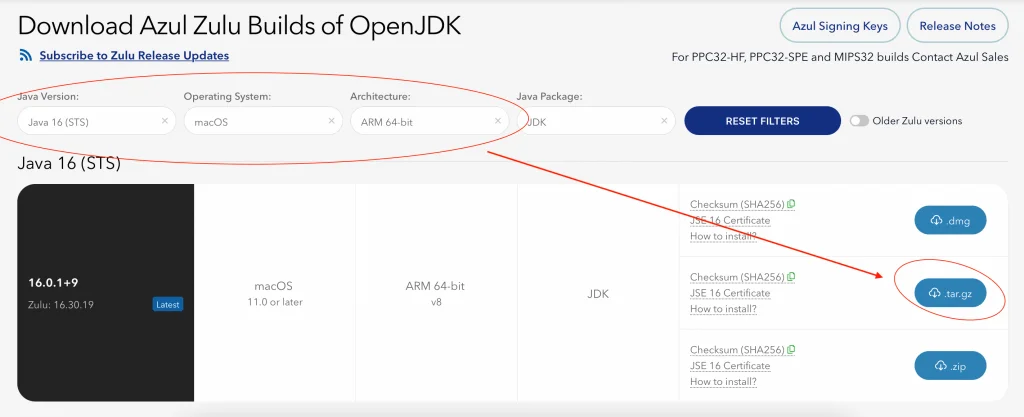
Now, you need a JDK that is optimized for M1. Luckily, the Azul JDK has just what you need. As Minecraft 1.17 and 1.18.2 requires Java 16, you will have to download Java 16. Go here to download the JDK: https://www.azul.com/downloads/?package=jdk. Select Java 16 (STS) as the Java version, macOS as the Operating System, and ARM 64-bit as the architecture. This time, instead of downloading the .dmg file, download the tar.gz folder.
NOTE: Azul has discontinued Java 16. However, Java 17 will work fine. Please download Java 17 (LTS) instead. This is also a requirement for 1.18.2.
Now that you’ve downloaded the JDK, extract the .tar.gz file downloaded, and then go into the folder the Archive Utility created. There should be a folder called “zulu-16.jdk”. Copy that folder to your home directory.
Step 3: Set up MultiMC to Optimize Minecraft 1.17 for M1
Next, start up MultiMC. Select your language. It will then ask you about your Java version. Type this path in for the Java version:
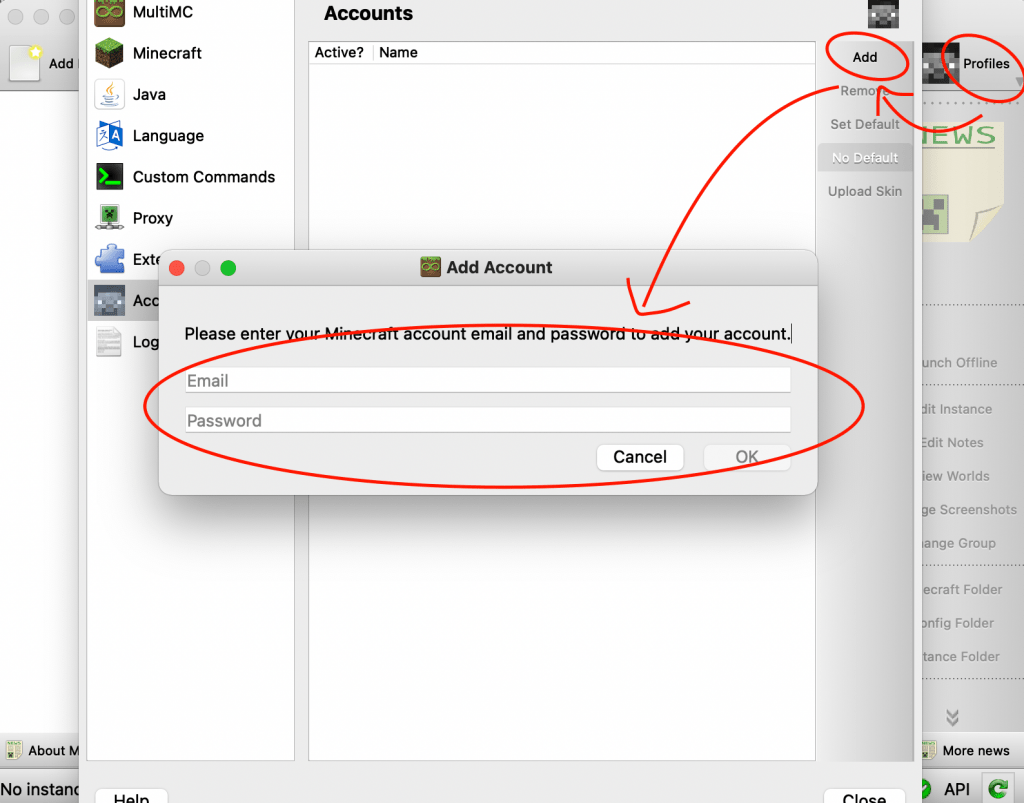
/Users/[YOUR USERNAME]/zulu-16.jdk/Contents/Home/bin/javaIt will then ask you about analytics. You can choose your preference on that one. Head over to Profiles at the top and select “Manage Accounts” in the dropdown. Click add and enter your Minecraft account credentials.
Step 4: Managing lwjgl
Thanks to the work of tanmayb123 on GitHub, we’re able to fix lwjgl for M1. Info Toast has a minimal package that contains everything you need to follow this tutorial.
Download M1 Lwjgl PatchOnce you have downloaded our patch, extract it and go into the folder created. Copy the “lwjglnatives” folder and place it in your home directory.
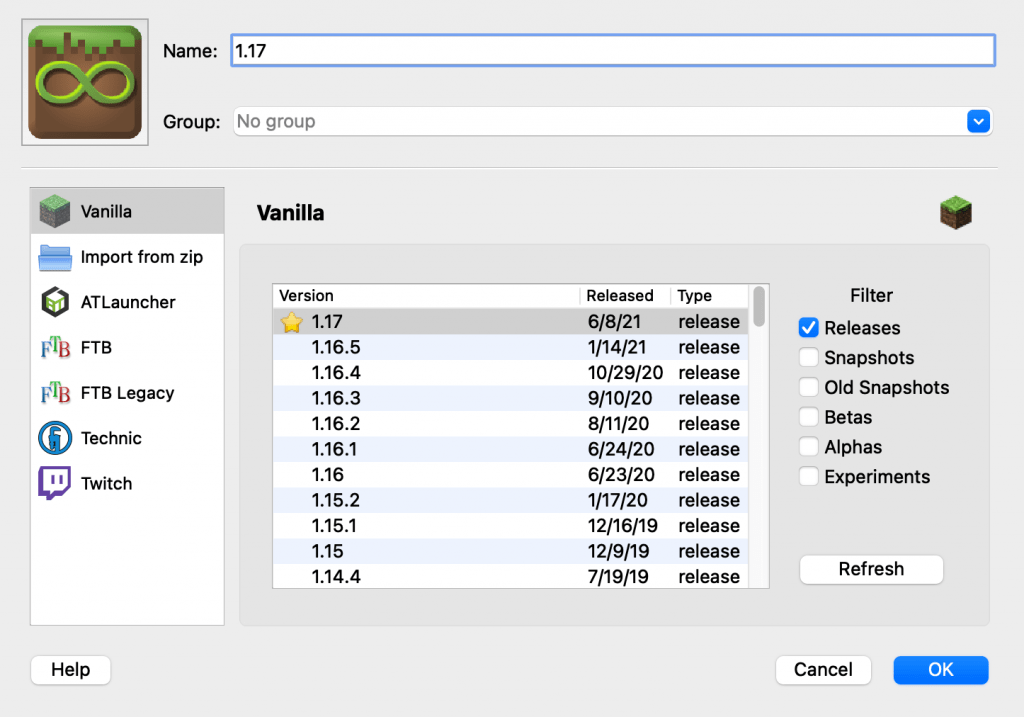
Now, in MultiMC, create a new instance. Use 1.17 or whatever later version as your Minecraft version. Press OK and it will download the stuff needed.
Now, right-click Edit Instance and go down to the settings tab. Click the checkbox next to the Java arguments and paste these arguments in:
-Dorg.lwjgl.librarypath=/Users/[YOUR USERNAME]/lwjglnatives/ -Dfml.earlyprogresswindow=false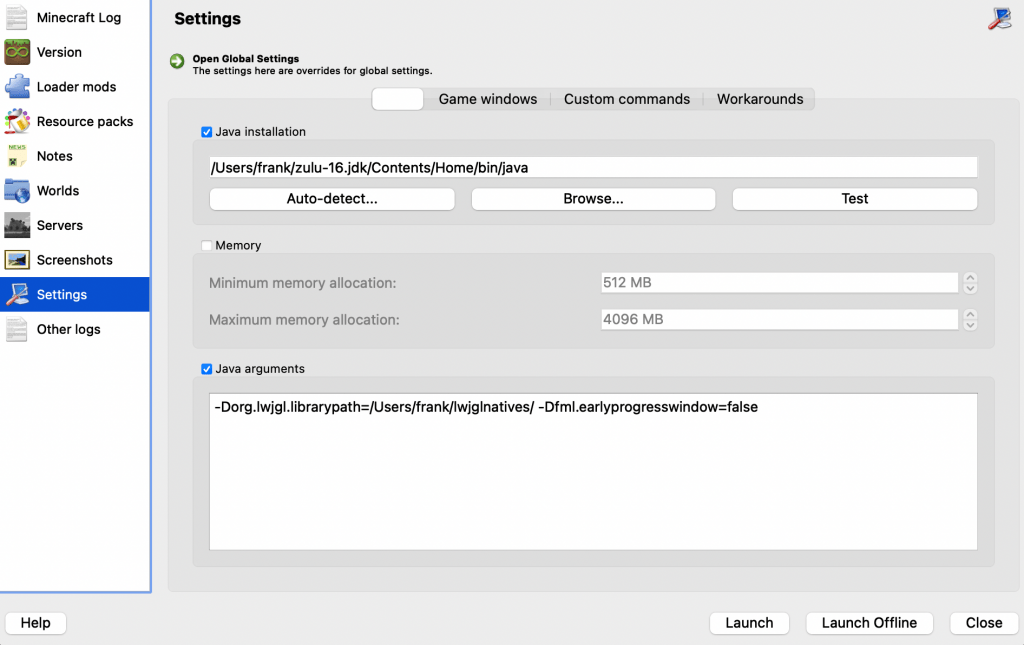
Now, head over to your Version tab. Click on LWJGL 3, then Edit.
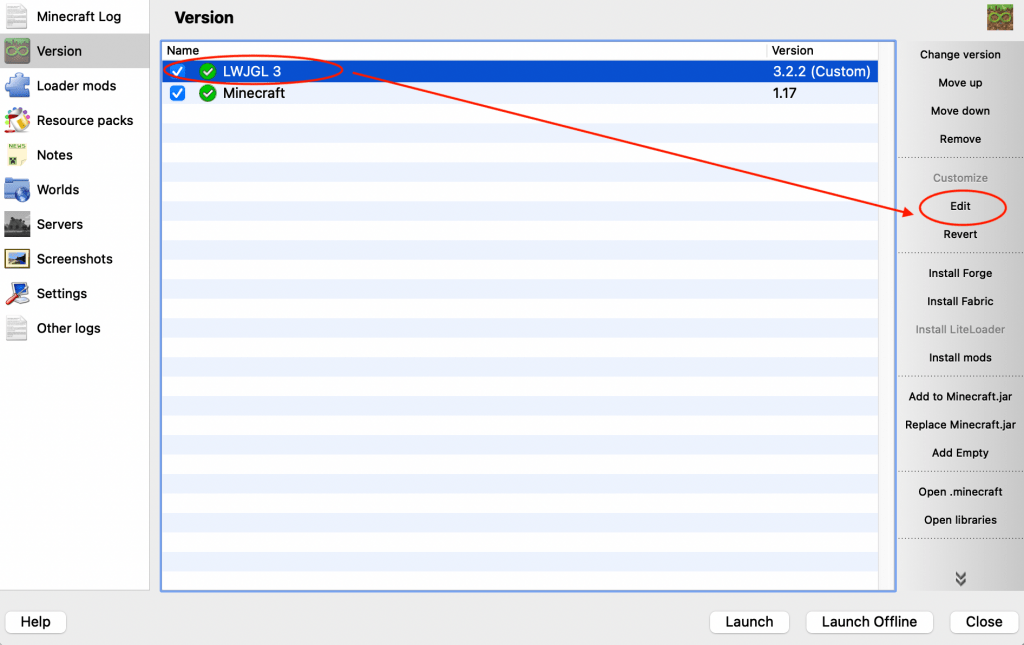
It will open up a text editor. Delete everything in there already and paste in the following:
{
"formatVersion": 1,
"libraries": [
{
"name": "lwjgl:lwjglfat:1",
"MMC-hint": "local",
"MMC-filename": "lwjglfat.jar"
}
],
"name": "LWJGL 3",
"releaseTime": "2019-06-24T12:52:52+00:00",
"type": "release",
"uid": "org.lwjgl3",
"version": "3.2.2"
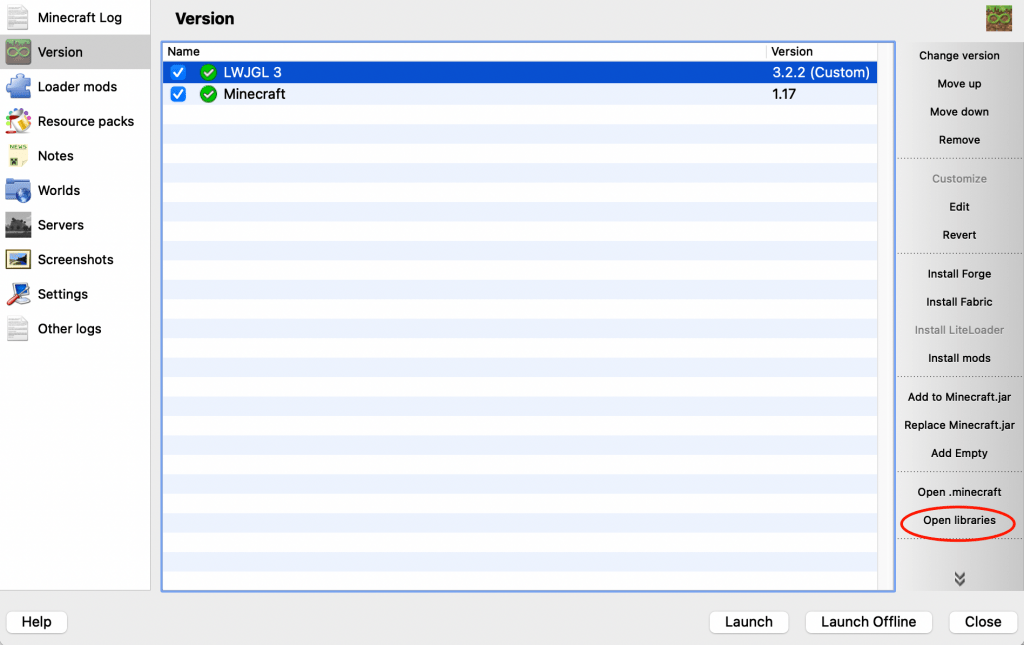
}Now that that’s pasted in, you will have to import the lwjglfat.jar from the download earlier. Click “Open libraries” and paste the lwjglfat.jar file in the Finder window it shows.
That’s it; you’re done! You have Optimized Minecraft 1.17 or 1.18.2 for M1. Click Launch to start Minecraft, and if it doesn’t work, we’re happy to help you on the Info Toast discord: https://discord.gg/infotoast.


https://infotoast.org/ToastCDN/uploads/Frank/1624120281/M1-lwjgl.zip
I cant download it
it says I dont have the permission to access this file
with 403 Forbidden
This has been fixed.
Is anyone else having issues running Minecraft version 1.17.1 on M1 using this method?
Please join the Info Toast discord for support. I noticed you joined and then left. We’re willing to help if you need anything.
Thank you for sharing. I’m from China. I just tried. From 5-60fps under the official starter to 100-110fps running on the arm, it has been greatly improved. In addition, I’d like to translate and reprint the article to my blog. Would you like to?
my blog :hutuyun.top
Hi, unfortunately the download of the lwjgl.zip no longer works.
Could you fix the download please?
It has been fixed. Next time, please join the Discord for immediate support as we only review comments every several days.
Thank you so much! I knew my air had much more punch that I was getting with the regular install. Running in 4k with no stutter at max. You’re a legend!
A couple of questions:
1. From the Github repository for LWJL, it looks like LWJL just recently added official support for MacOS arm64. Does this change the need to download the lwjl patch file in this process?
2. Should this process mostly work the same for Minecraft 1.18? (Except for of course having to use Java 17.)
1. Use our LWJGL
2. Yes, mc 1.18 will work the same as 1.17, just make sure you’re using Java 17
One thing that I’ve notice with 1.18 is that there seems to be some kind of bug which causes the MultiMC launcher to ignore OptiFine HD U H3 pre4 for Minecraft 1.18. You can add it to the instance, but when you load Minecraft it will not use optifine. This doesn’t seem to have anything to do with M1 Macs or the instructions given here because I can create a 1.18 instance using an x86 Java 17 installation with the default LWGJL and the problem persists. On the other hand the latest optifine works fine with the official Minecraft Launcher, so this seems specific to MultiMC with optifine for mc 1.18. This is obviously not likely to be something that the authors of this blog have control over, but I think it is something people reading this should be aware of. You can have Minecraft running natively using MultiMC or you can have it running non-natively through the official launcher with optifine, but it doesn’t seem like you can have both at the same time. The only other option would to be to try and find a solution that uses the official Minecraft Launcher.
This turns out to be only partly true. Optifine will not work by default, but there is a a workaround:
https://github.com/sp614x/optifine/issues/6418